An Attic Bedroom (Before & After)

We have been so enjoying the renovated attic for almost four months now, and I’m excited to share this last part of it!

textures of whites

As I’ve talked about before, all three kids shared a bedroom until this attic renovation, which worked (you do what you have to, right?), but it has been SO wonderful to have a bit more space and be more organized now! The two girls have moved upstairs to the new bedroom.

I did tell them that I would be so happy to trade with them; they can have the master suite and Ben & I will take the new attic bedroom, but they were happy to stay in their new room. :)
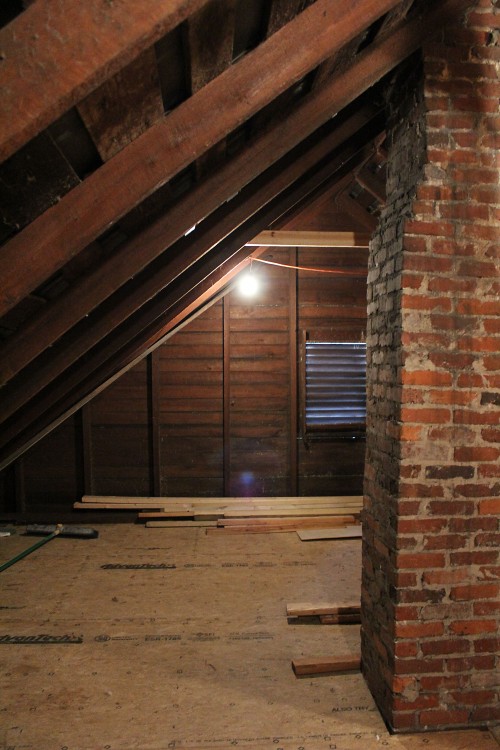
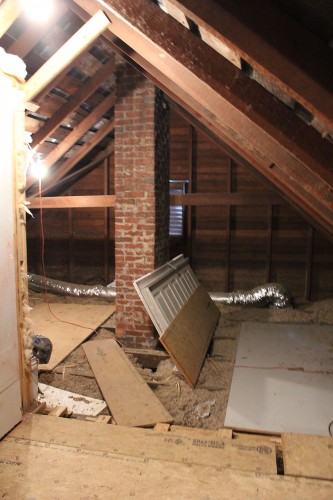
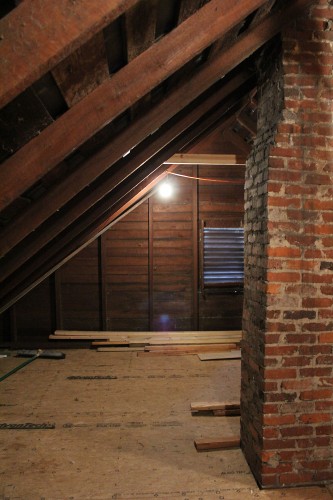
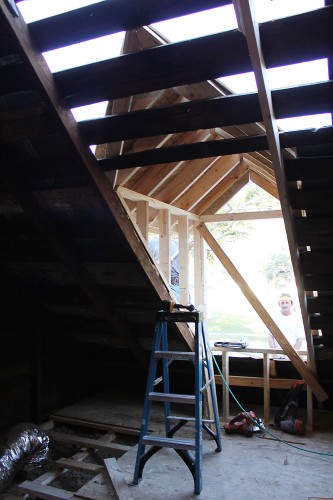
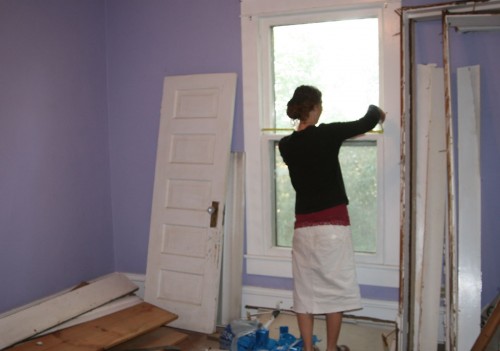
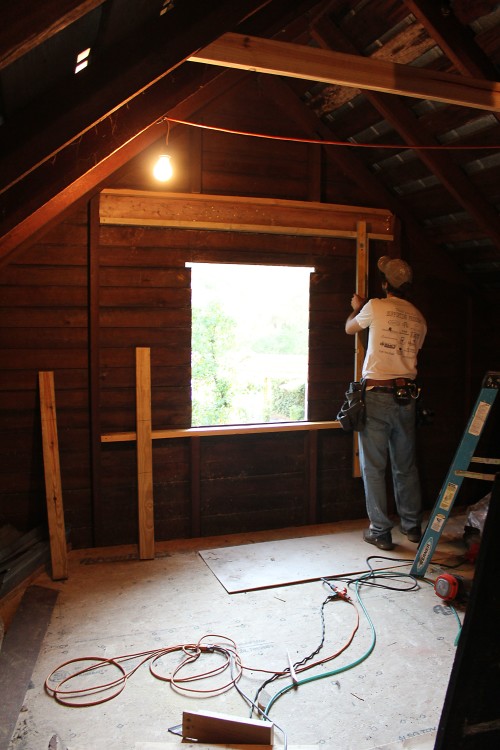
[Before]

A brick chimney from the kitchen and dining room came up through the middle of this room. Thankfully, the fireplaces were already not functioning, so we were able to take down the bricks to the floor level without disturbing the looks of the kitchen and dining room fireplaces.

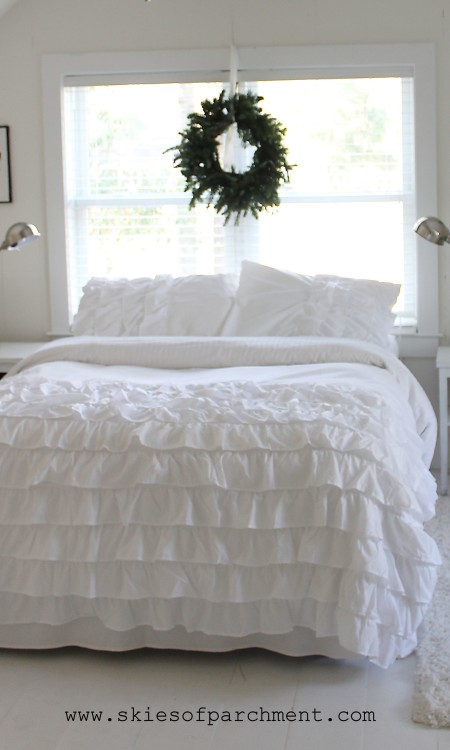
We also put in a beautiful big window where there was only a wooden vent before.

bedroom #2 bedroom #1

[ After ]

a white attic bedroom

a cottage bedroom

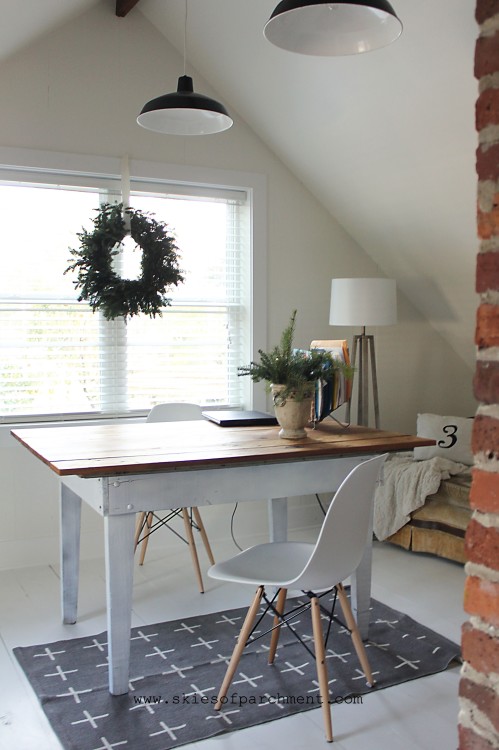
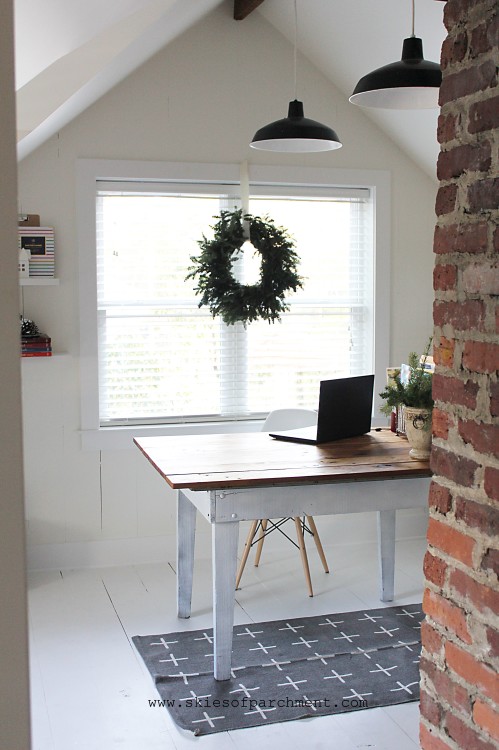
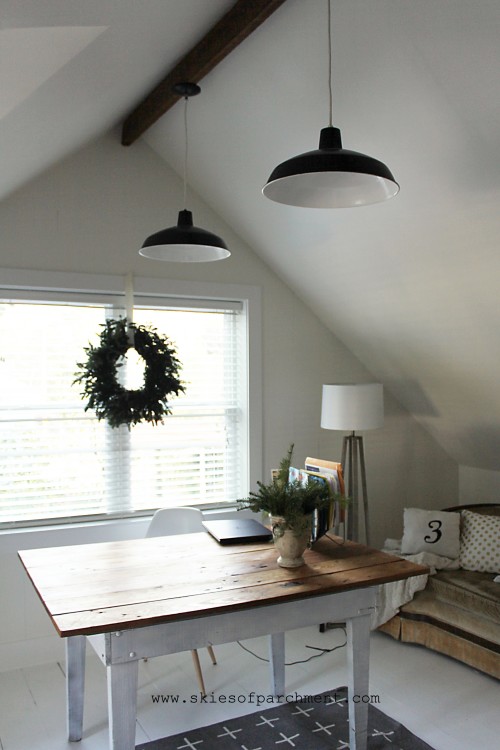
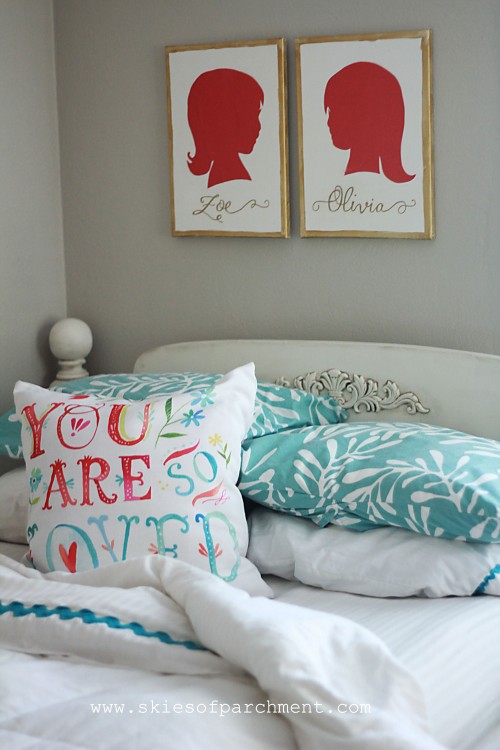
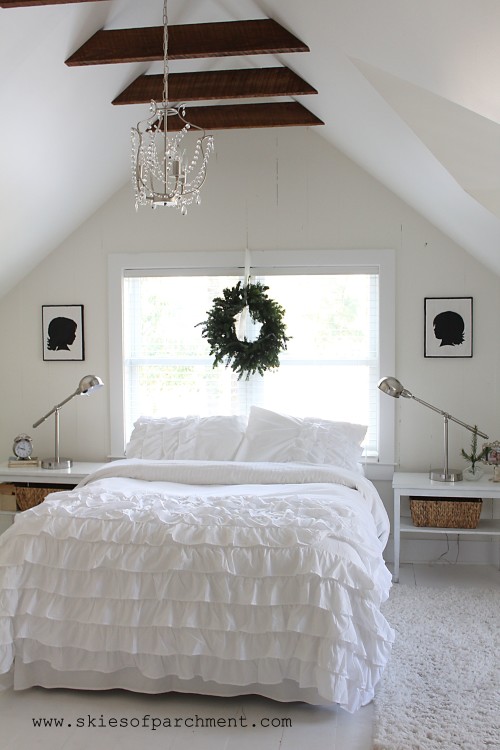
This room turned out almost as I had pictured in my mind; only, better.  As with the office, I was inspired by whites, clean empty space, and Norwegian-style simplicity. I don’t know that I nailed the beauty of the Norwegian style , but I have loved this darling space!

There is something about the white that is so refreshing, and makes my whole brain feel clean. I love to come up in the office to do my emails and business. I love to snuggle with the girls in their bed at night or in the morning. I think I could live upstairs if someone would only bring me food. Personal chef, anyone?

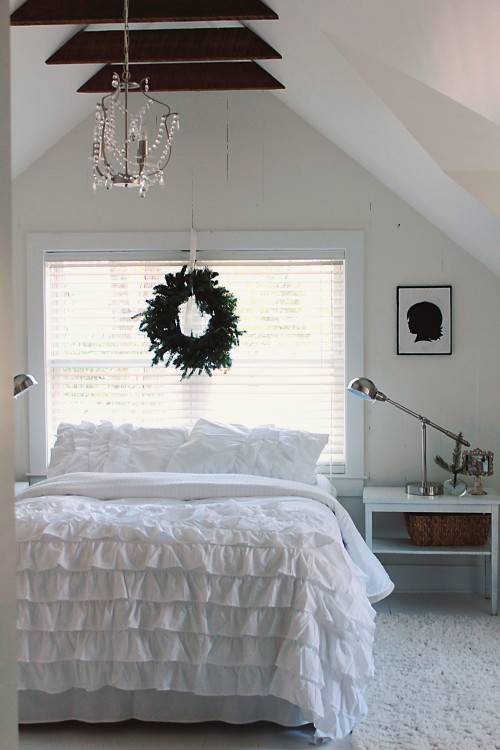
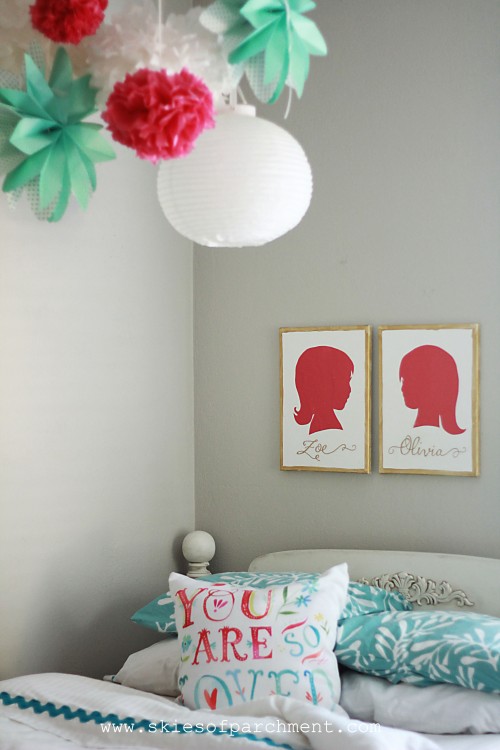
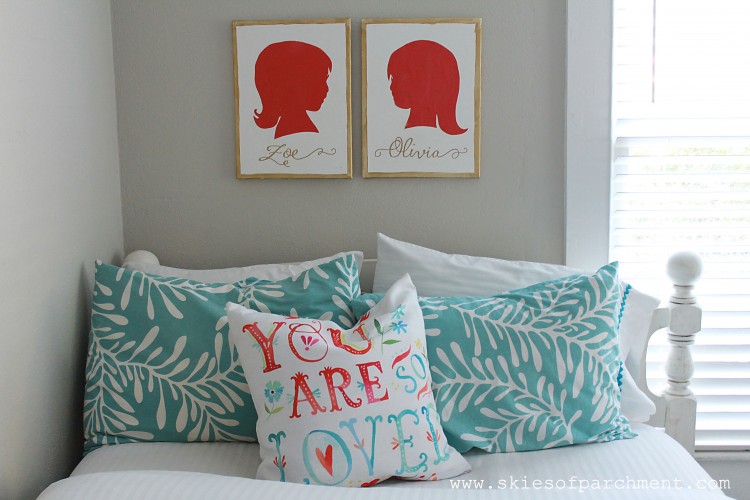
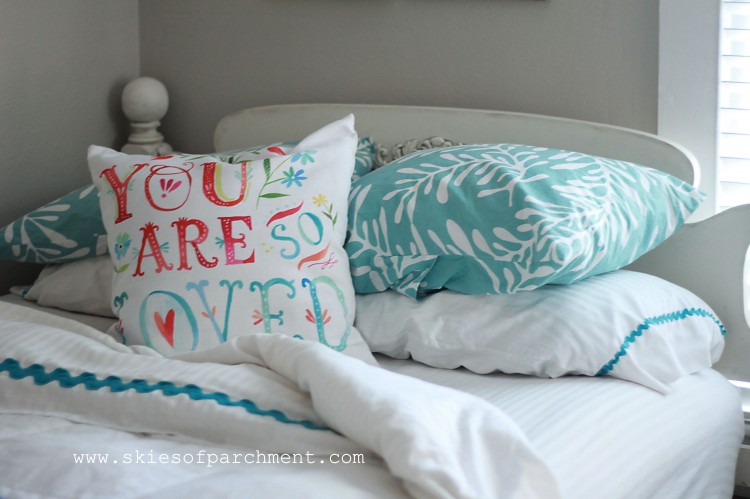
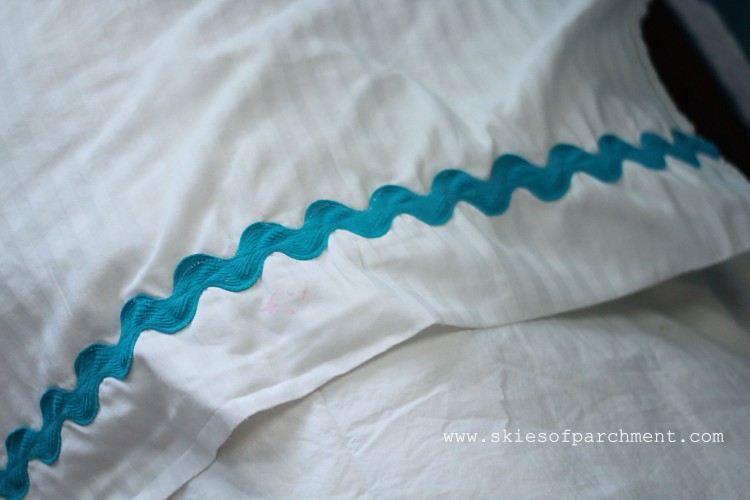
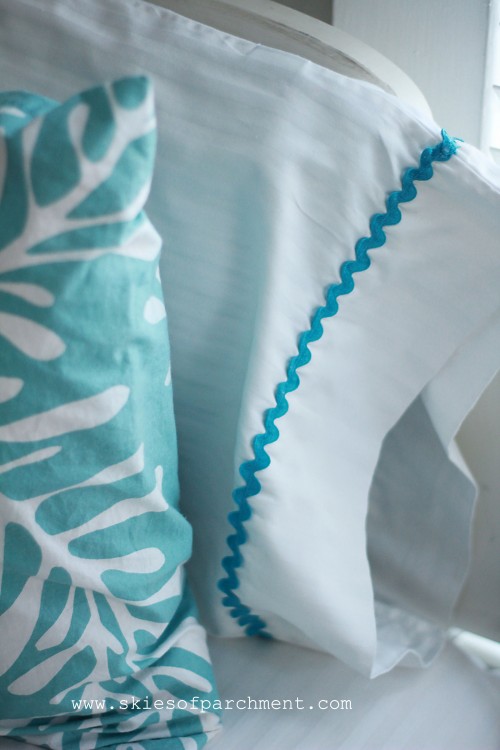
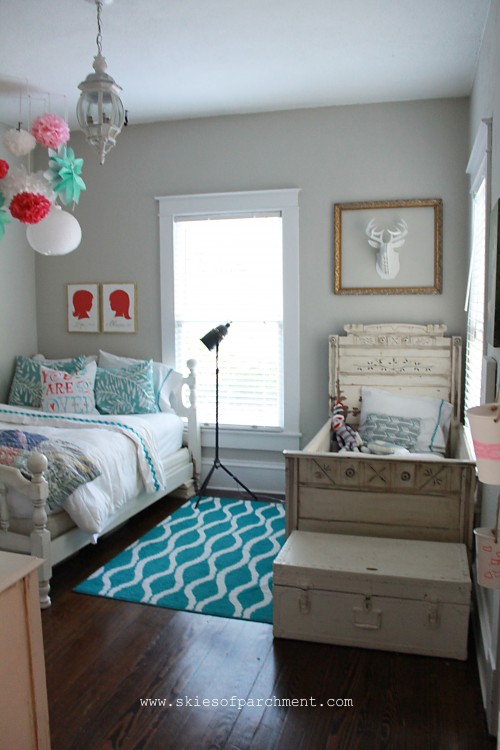
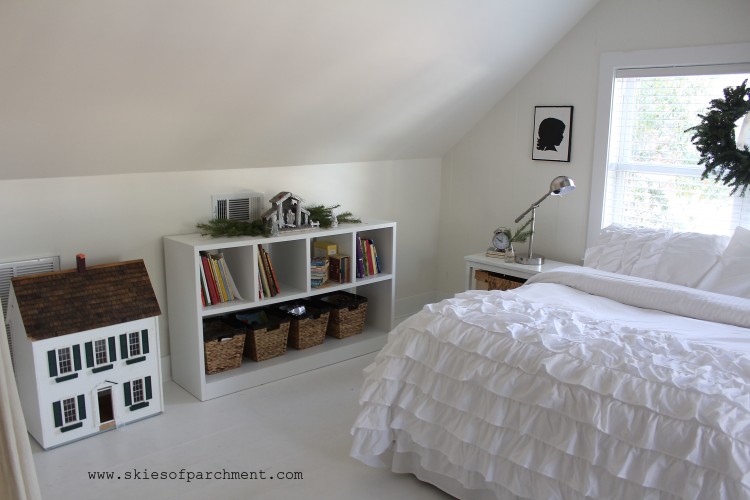
For the bed and bedding, I chose just a bedrail underneath with no headboard or footboard. The window serves as the headboard, and the shams and bedspread are the perfect accent piece to bring a bit of elegance to the room.

  white ruffled bedspread

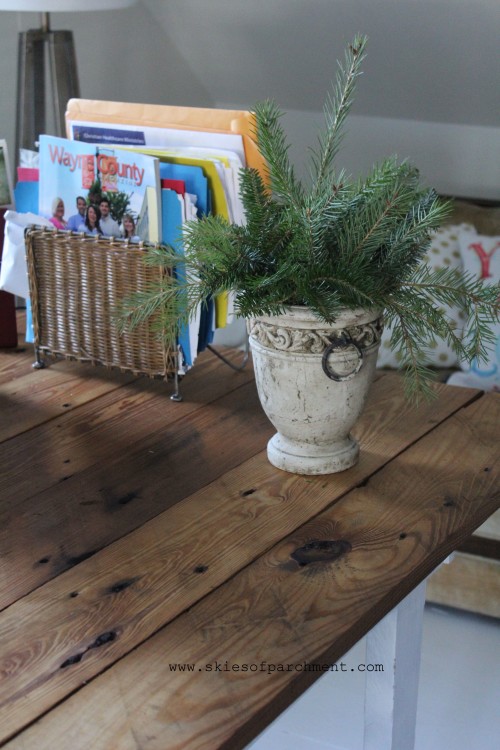
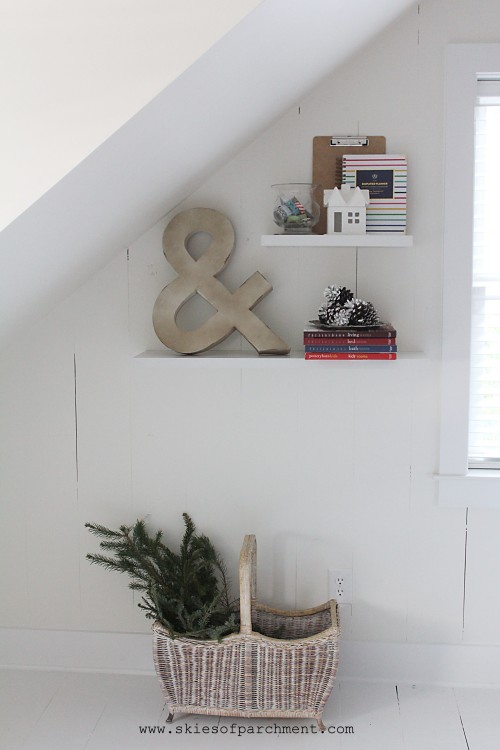
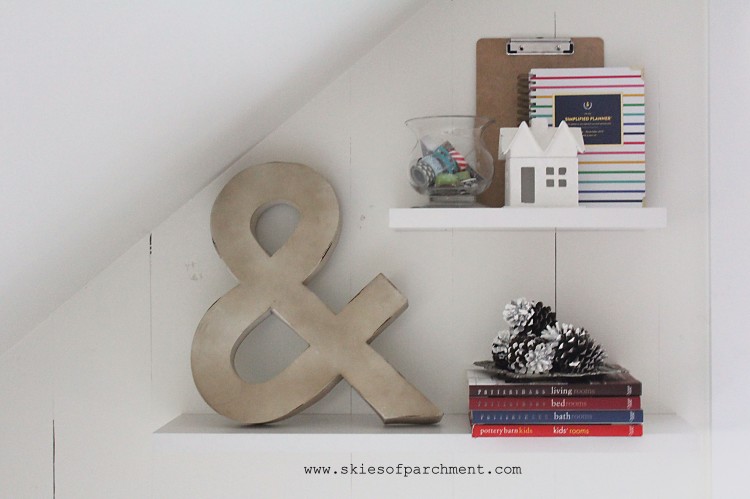
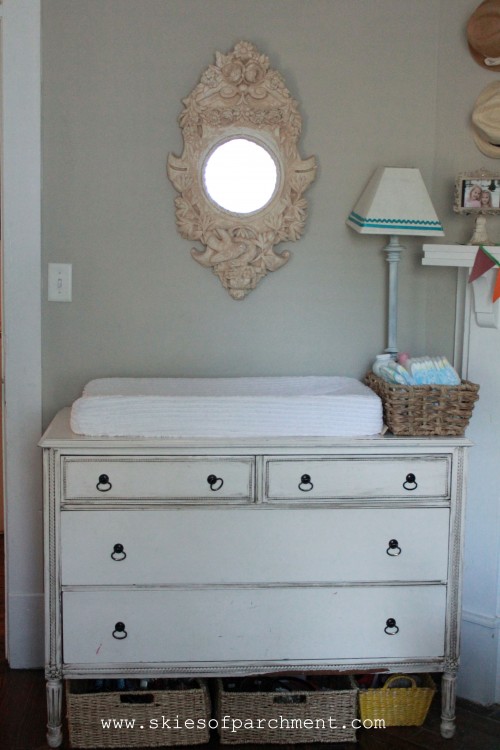
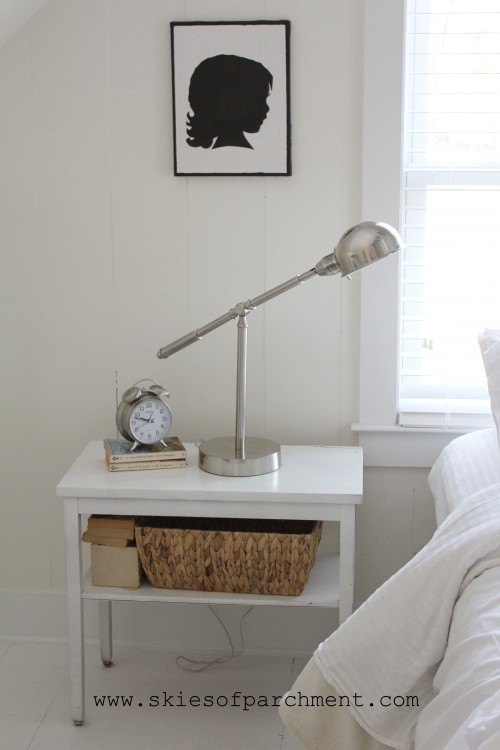
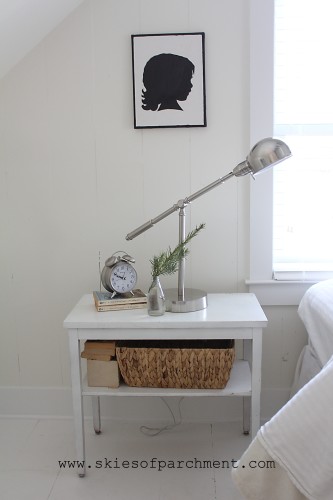
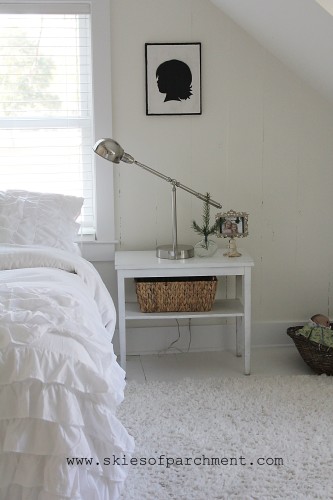
The end tables were found at a local antique store, and I spray-painted them white. I wanted a touch of modern in the room, and after looking everywhere online and in stores, I finally found lamps like I was wanting at Lowe’s, of all places, and they were the most reasonably priced I’d seen too. The baskets are the perfect catch-all for the dozens of papers and pens and Little Tiny Objects that little girls just seem to collect like magnets.

  a cottage christmas 128 a cottage christmas 107

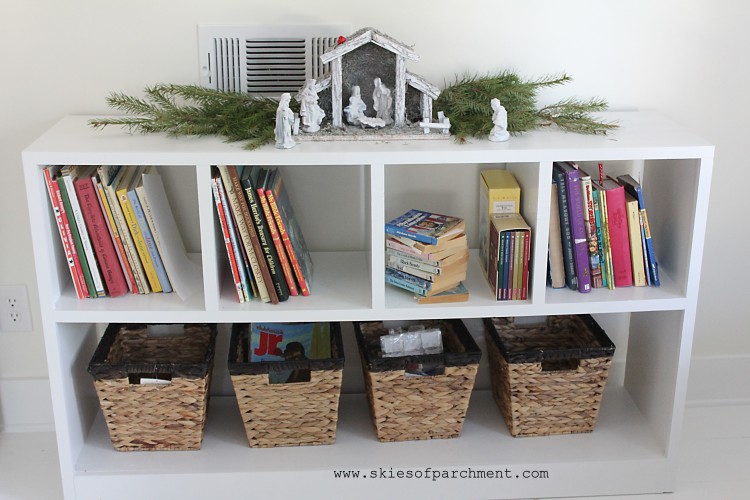
Ben made this piece for me, inspired by a similar design from IKEA. IKEA sells them inexpensively but we live far from one, and shipping would have brought the price to a ridiculous amount. There are amazing perks to have a husband who can create anything with wood. :) This is one of them! It houses books in the little boxes, and toys, stuffed animals, and games in the baskets underneath.

  book shelf and baskets

[obviously these pictures were taken at Christmastime :) ]

a little girls' attic bedroom

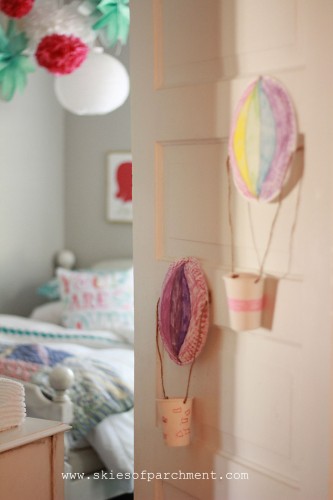
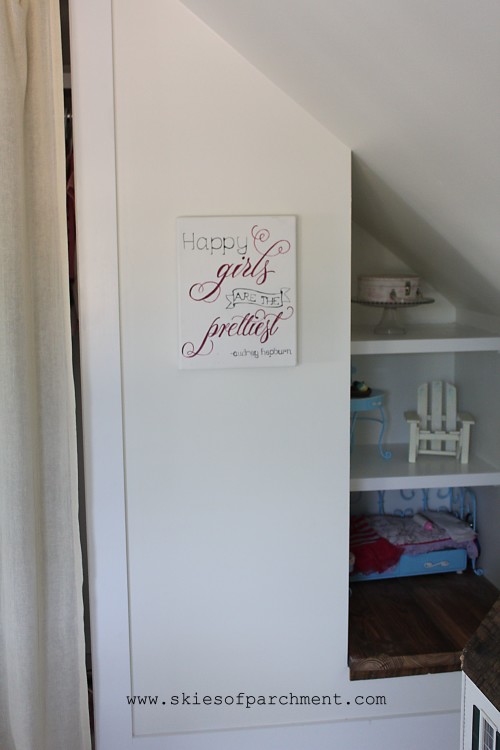
This little corner was Ben’s idea. Rather than having a long closet with difficult access to the end of it, the closet was cut a bit shorter and this nook created. The girls love it. It’s become like a little dollhouse with beds and rooms and furniture set up.

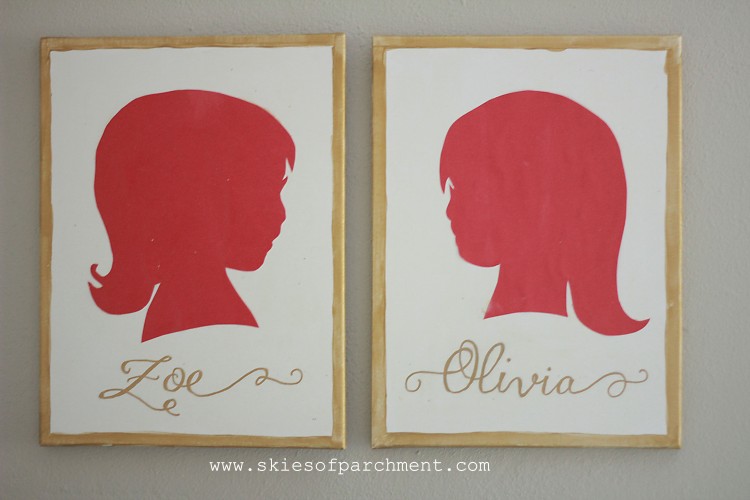
(artwork from Aimee Weaver Designs ♥)

  happy girls are the prettiest

There is no door on the closet. This was intentional, giving more space to the actual room because of not having a swinging door. I love the touch of texture that the curtain panel gives to the room.

looking into the office

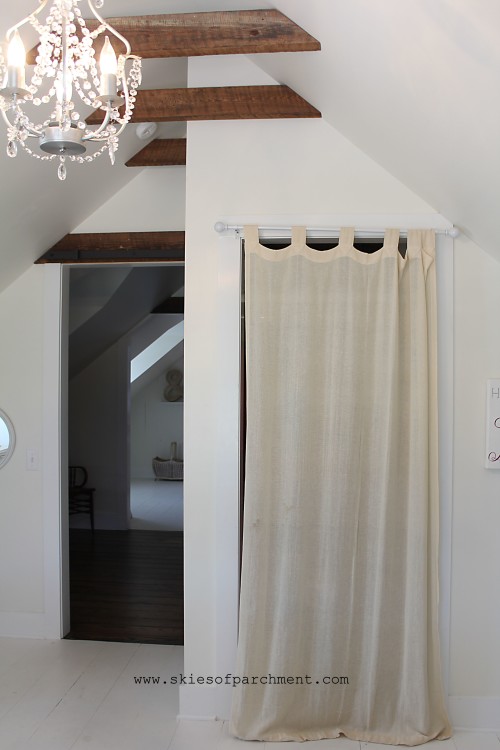
Aren’t these beams beautiful?! I swoon.
They are not original beams, although they are original wood used from the attic.

elements of wood and sparkle

doorways of the attic

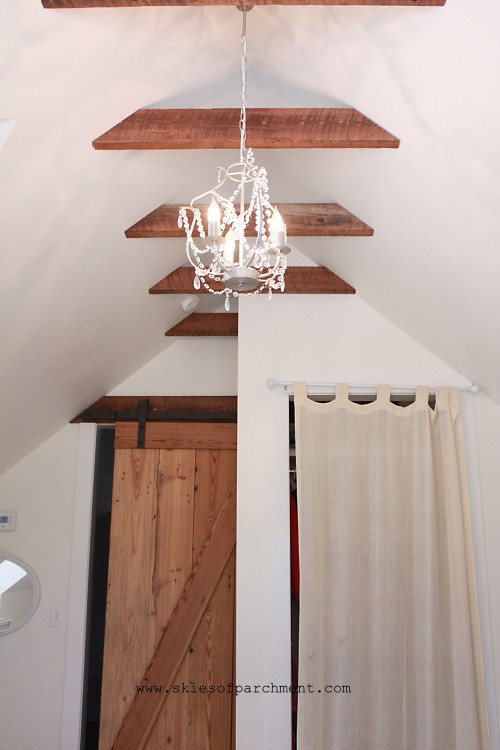
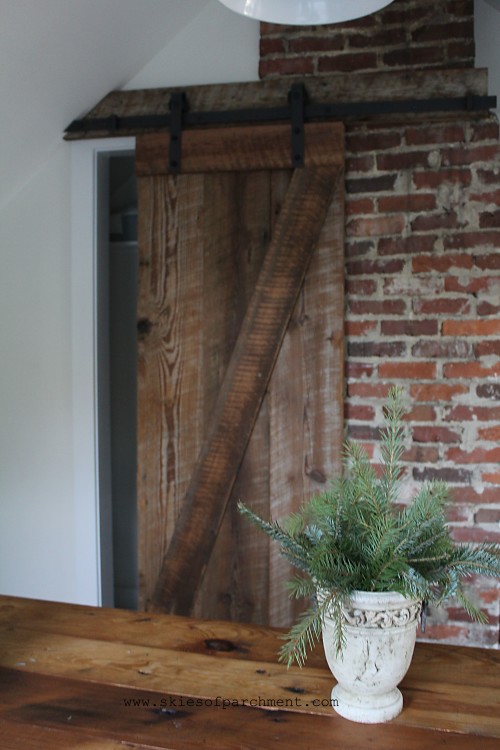
Another sliding barn door is in this room, used for the bedroom door. I swoon again.

  wooden barn door

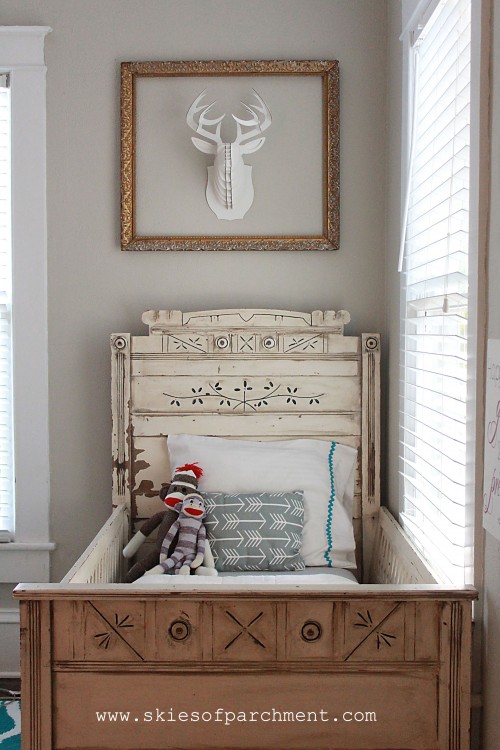
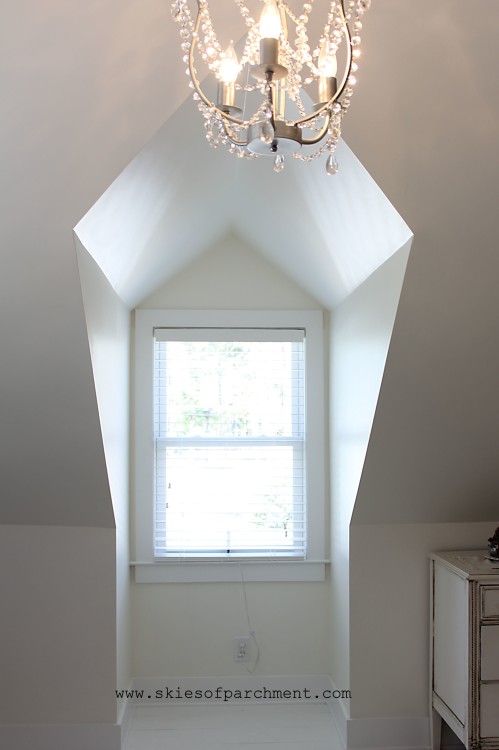
The bedroom has a cathedral dormer window as well, which was my brother-in-law Chris’ idea. I love it! The cathedral style adds such character, rather than a flat-topped dormer. We kept the knee-walls fairly low outside of the dormer for the illusion of more space. It’s just a head-banger if we’re not careful. :)

  cathedral dormers

Ben humored me again with having white floors, and white walls, and white ceiling…. white everything.  He is so kind to me, going along with my ideas so much of the time, and then coming up with so many great ones of his own. He is the brain behind the structural design of the remodeling we’ve done. This attic was just one giant room, that he created three rooms from (office, bedroom, and foyer). I can hardly believe this is the same space; it is just SO beautiful!

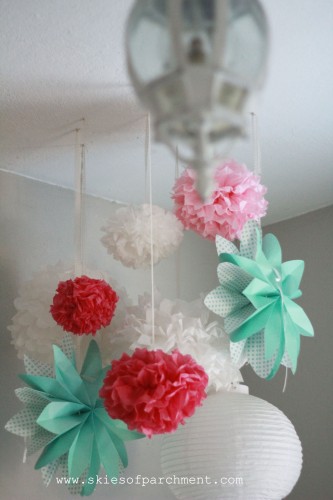
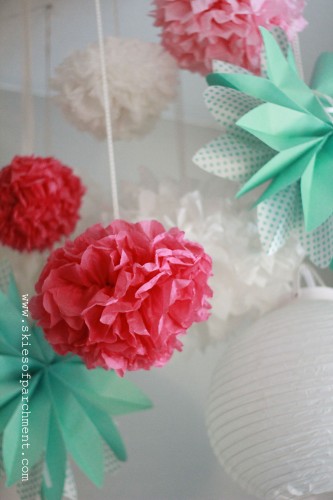
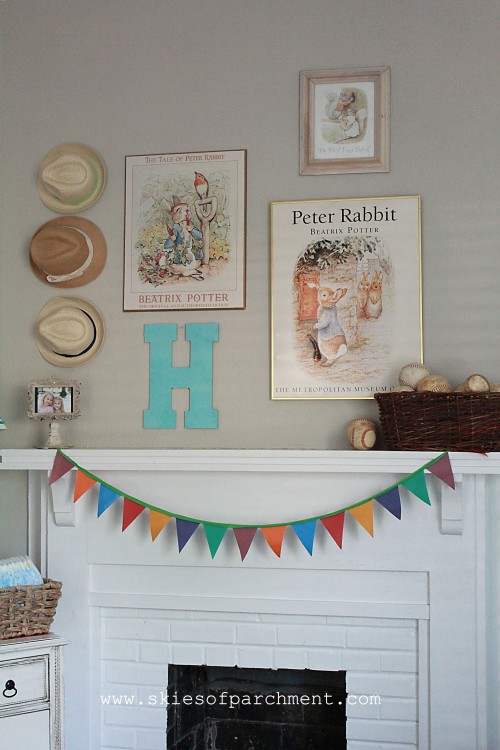
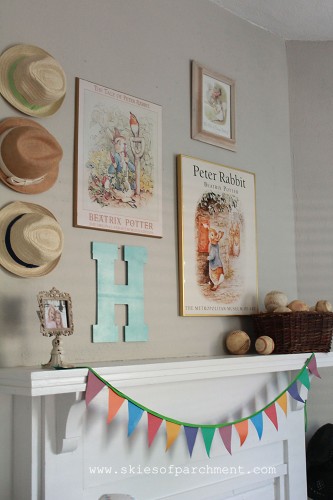
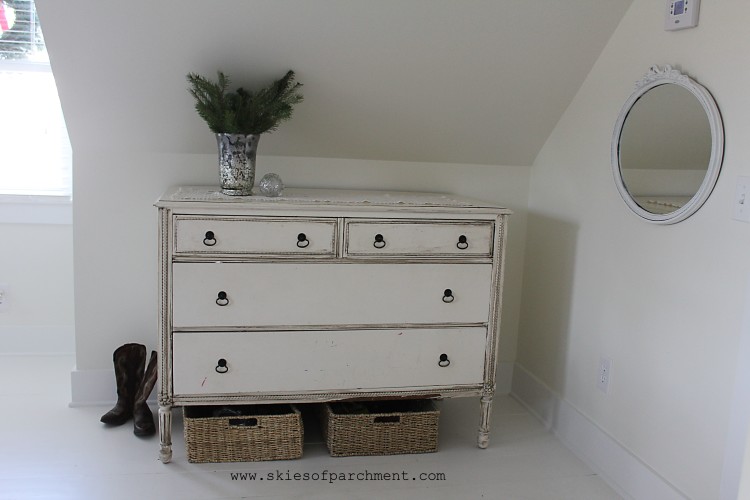
The room is very simple and understated, but here are a few of my favorite little touches…

cozy little spot

  bedroom vignette

a bit of whimsy
Funny story about the ‘simple and understated’: Zoe was so excited when she learned that she and Olivia would be sharing a room, and having a GIRLS’ room. She immediately began dreaming of all the COLORS (!!!) she wanted in there.

“Red on the ceiling! No, actually, red and white STRIPES! And I want aqua and lots of color!

I felt a little guilty, because well, a little girl does like color, and here I was going with not only limited color but NO color except white, so I told her that, “Sweetie, you know what? It’s actually going to be a white bedroom, because it’s in an attic, and red and white stripes just won’t really look good up there.”

“WHAT?! A white bedroom? I don’t want to be a little girl that looks back on my childhood and has a WHITE bedroom. I mean, white doesn’t even mean anything. I want something with color, and especially RED. It would be soooo boring to have a white bedroom!”

I don’t know what she was picturing, but clearly she and I were envisioning completely different things. I was beginning to feel like a terrible mother in forcing my child to have a terrible childhood and have a white bedroom, or all things!!

After the room was completed, however, she came to me with a sheepish grin and said, “Mommy, it’s okay if my room is all white. I actually REALLY like it.” :)

And a few weeks later when we bought her a red winter coat, she said that makes up for the red stripes in the bedroom. Whew. At least we got that covered.

Seriously though, I love to be a steward of that which Jesus has entrusted to me. My home is my little spot on earth’s surface, and I love how Edith Schaeffer says it:

“A Christian, who realizes he has been made in the image of the Creator God and is therefore meant to be creative on a finite level, should certainly have more understanding of his responsibility to treat God’s creation with sensitivity, and should develop his talents to do something to beautify his little spot on the earth’s surface.”
Edith Schaeffer, The Hidden Art of Homemaking    

Sometimes, in a world of ISIS terrorism and starving children and four blood moons, I stop and wonder why I even care about pretty things or home renovations, or why a beautiful new arrangement makes me so excited, or why I’m so passionate about helping people to better health. I DO care about the first mentioned things, but I also care about seemingly small things.

And then I remember… just because I love the sight of a freshly made bed, or cry happy tears at an email with good health news, or get giddy at before & afters, it doesn’t make one less spiritual. It is learning to see the beauty of God in the middle of a broken world, and taking notice of these things is actually worshipping Him and thanking Him for the ways we see Him. Edith Schaeffer says it beautifully again:

“If you have been afraid that your love of beautiful flowers and the flickering flame of the candle is somehow less spiritual than living in starkness and ugliness, remember that He who created you to be creative gave you the things with which to make beauty and the sensitivity to appreciate and respond to His creation.”  

 Responding to and appreciating His creation… with the goal of bringing Him glory: that’s what I want to do.

  a simple attic bedroom

 Happy Hump-day, Lovelies!

  signature

 Sources:
Desk Lamps: Lowe’s, Allen + Roth
White Waterfall Bedspread and shams: Ebay, similar here (they must have been running a special the day I purchased, because I paid less than half the price for the one I found)
Wall and ceiling color: Dove White, by Sherwin Williams, eggshell finish
Floor color: White Exterior-grade paint
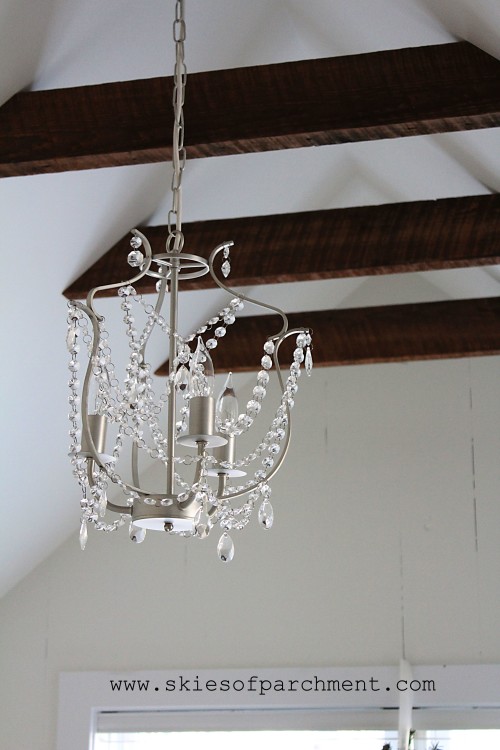
Chandelier: IKEA, purchased from Ebay

Before & After – Attic Office Studio

So! I am over the top excited to show some pictures of our renovation process! Last fall felt like a whirlwind of action and work as we began the attic renovation and completed it in 10 weeks, just in time for the Christmas Tour of Homes we were scheduled for.

We thought our following two months would be slow(er), but they’ve also been filled up with some unexpected events, bringing us almost to March and I still haven’t shown the attic reveal!

There are several rooms that have been changed around here at the Cottage as a result of two additional rooms upstairs, but today we’ll begin with the attic, and the Office Studio on one side.

attic office


I have told people that if someone would bring me food and water, I could literally live in these two rooms upstairs. I absolutely love it!

I (I saw “I” because my husband very kindly let me choose the colors and style up here, but he did 99% of the work) went with whites – white on the walls, white on the floor, painted white wood on the end wall… A lot of white.

I was inspired by Swedish and Norwegian homes of much white space, and therefore minimalistic décor. I wanted a very simple look with clean lines. I couldn’t be happier with how this space turned out!

But first! A before shot. No windows, no insulation, not even a floor. Just dark.

We were working with a small-ish space, with very steep roof lines, and so wanted to use the fullest potential of this area.

bedroom #1 before
And the same space, after:

a white attic office


I know!!!!! Can you even believe it’s the same space?! I feel like I’m walking into a dream every time I come up here.

Our basic game plan for this room was to add a dormer window toward the front of the house, a big double window out the side, add electric and A/C, add knee-walls and then dry wall on the walls and ceiling, add flooring, add wood to the end wall. It was a LOT OF WORK. My husband did most of the work himself, along with working a full-time job. He put in so much time and hard work! And the way he transforms a place is simply amazing. His German work-horse roots come out in full force during something like this. :) I am simply in amazement of his vision and then the way he reaches his goal. There’s a reason he is wanted in the construction business!

The ceiling is high, about 13 feet at the peak. And this room is sized about 10 X 12, so we weren’t looking at a huge area, but because we only have two bedrooms on the lower level of the house, having this additional space was going to be wonderful! This room could be a bedroom, but we are using it as an office studio for now.

Ben and I share this office space. It’s simple, it’s white, it’s clean. I LOVE IT! Long-term our set-up probably wouldn’t be ideal, but for now we have a table for a desk, some filing cabinets hidden to the side, and a closet which holds any extras for us.

There were two brick fireplaces going up through the attic, due to two double fireplaces (that equals four) in the four front rooms of the house. I was so thankful we were able to place the rooms so we could save one of the chimneys going through the roof. I love the warmth it brings to this attic space, and gives it such a studio feel.

He also MADE (insert a million heart eyes) this sliding barn door, or actually three of them, for the upstairs. The closet uses one of them.

sliding door in the office


This table I found for super cheap at a thrift store, and my husband thought it was so ugly and couldn’t believe I would pay money for it. So he added the reclaimed lumber to the top and it turned into a gorgeous piece!

farmhouse style desk for the office


The sofa (which I found for $35 dollars on craigslist (and now I a.d.o.r.e. craigslist all the more) adds the perfect touch of warmth and texture to the room.

tufted sofa for the office

vintage sofa with modern pillows


The décor is minimal, but this little area is a favorite of mine:

floating shelves

floating shelves with simple decor


I’m learning, when having a palate of white, that texture is essential. So while most of the décor is white, here are a few ways I’ve added texture:

– the Eiffel chairs add a modern element [wooden legs, smooth chair]
-the table [white painted legs, top made of reclaimed lumber – thank you, dear Husband!]
– the shelves [floating style, shiny finish]
– wood boards on the end wall, and painted
– wooden floor, also painted but slightly different color than the walls
– metal pendant lights, painted black for contrast
-metal distressed ampersand

Each thing is a slightly different material, or color, or texture. And putting it all together with the slight differences but similarities are what give it a clean but warm feel.

an attic office


I think the work of restoration is so amazing. And such a picture of the redemption of Christ in the life of a person! He takes what we think is ugly, useless, beyond hope, and turns it into a masterpiece. If we as humans can do physical repair, how much more can the Great Restorer work on a deep soul level! I love that picture.

Be blessed because of the work of the Restorer in your life today!

signature

Sources:
Wall and Ceiling Color: Dove White, Sherwin Williams, eggshell finish
Floor: White Exterior Grade Paint
Eiffel Chairs: Amazon, similar here
Floor Lamp: Target, found here (and they are 10% off now!)
Floating Shelves: Lowe’s, found here
Metal Pendant Lights: we found them free!
Swiss Cross/Plus Sign Rug: Urban Outfitters, here
Table: thrifted, and Ben added the reclaimed lumber to the top


Attic Bedroom Sneak Peak

white attic bedroom

The attic renovation is literally just minutes away from being completely finished!! It is so exciting, and both Husband and I are nearly in shock that everything is actually coming together. :) It has been a huge project, but now is the fun part – the “painting of the canvas” that we’ve created, making it into a home.

I don’t have time for a detailed post, but I’m just so excited I want to show a quick picture. ;)
Everything has come together so well; it has been so busy, but not really stressful. It’s been peaceful, even with the incredible work days, works night that have varied from 12pm-3am the past week to try to get things finished up, and final details. The little things I’ve been collecting fit exactly as I thought they would; only better. I’m so grateful for the hand of God even in things like an attic remodel!

So just for fun, here is a before picture of the bedroom:

bedroom #2

And an after picture.

  white attic bedroom

It is a magical room. I want to move in there.

More details will come later! Today is a fun one;  finishing up last minute things for the Christmas Tour of Homes that is happening tomorrow!

Have a lovely weekend!

signature

And the attic renovations begin…

It has been an eventful past five days.
Beginning with a large tree falling in our yard and missing our house by inches, and a trip to the emergency room the very same night (in a completely unrelated incident) when Zoe gashed her head open from her eyebrow to halfway up her forehead and needed stitches… to our vehicle not starting when we got in to go to the ER, to several other smaller incidents. It was quite a day! But we are to thankful to all be okay, and Zoe is healing up well. I think I’m more traumatized than she was!

The next day, we had visitors! Long anticipated visitors! When Zoe had her accident she was so worried that her beloved auntie and uncle wouldn’t be able to come after all. But not to worry, all was well! :)

Chris and Claudia knew we were wanting to begin our attic renovations sometime this fall, and SO KINDLY offered to come and help us! The timing of this week worked well for them and us, and wow, are the boys ever tearing it up up there! Chris is a help so incredible we can’t even describe… taking time off of work to come and help work, but also to help with design ideas and planning. We would be so far behind if it weren’t so him! And Claudia, well, who doesn’t love having a sister around?! It is pure joy!

I’m not sure how detailed I’ll be about blogging and documenting this attic renovation, but for my own record I want to have at least a bit here and there.

So here are a few pictures of before, during, and now, as well as some inspiration pictures of what we have in mind for the finished product…

After only two days of work, the front of our house has changed so much! Two dormers are being added to the front of the house, both for looks and for light inside. I love how it already cozies up the house, and changes it into a Cape Cod style vs. a Bungalow.

adding dormers to the cottage


The first day… Monday morning. It began with a saw through the metal roof, making a giant hole. Too late to retreat. Yikes.

a hole in the roof

adding a dormer

The second chimney had to be taken down (see the picture above) because of it’s placement in the middle of a room in the attic. Thankfully, it was not the fireplace we use, so we will still have the looks of the fireplaces downstairs in the kitchen and dining room even though they will not be functional at all.

But back up a bit….

Presently our dear little cottage has only two bedrooms. My previous post talked about how all three kids are in one bedroom, which is great! :) However, we cannot do that forever, and in the long run the house will be valued at more if it has four bedrooms vs. two. So, the plan, begun four years ago in dreams only, was to turn the unused attic space into two more bedrooms. We added a stairway from the downstairs to the attic when we remodeled four years ago, because of eventually wanting to finish it out. But the stairs led to this:

bedroom #1 before bedroom #2

So, yes, there is an almost overwhelming amount of work to still be done. The interior has not be touched much at all, other than the dormers. However, just that alone makes me so excited because it brings in so much LIGHT. And I absolutely LOVE natural light!

rough framed dormer with cathedral ceiling
At this point, there is not much more I can do than clean up the dust at the end of the day. So I can peruse the internet and dream about the finished product. ;) We are on a time-crunch: this has to be completed and decorated by December 13, so we have just a little over two months. Which, if that’s all my husband would do, that would be fine. But this will be done evenings and weekends, which means our autumn looks just a leeeeetle crazy……..

But look at some of these pictures that I’m inspired by, and you’ll see why I’m really really excited. :) I’m drawn to white as I look through pictures, a lot of white. So I am wanting to go with a very simple, natural look. Maybe more European inspired?

simple and fresh

 image via


attic rooms

image via

love this attic room


image via

boards running vertical

Image via

We plan to use one of the rooms as a bedroom, and one of them as an office/work area. Here are few inspiration pictures for that…

Pretty little attic art studio.

image via


office space

 Image via

THIS is what i want.


 Image via

Sooo,  that is what is happening around these parts right now, and over the next two months. It’s fun and exhausting and exhilarating and exciting all at once. :)

signature


The Kids’ Bedroom {Before & After}

coral and aqua bedroom

So I’m trying to catch up on some of the before & afters here at the Cottage, before some more changes happen. Next week, hopefully, we begin renovations to turn the upstairs attic space into two new bedrooms. We are EXCITED!

At the moment, we have two bedrooms. One for the parents, one for the three kids.

This post could more properly be titled: How to Fit Three Kids in One Bedroom.

As you can imagine, it works! :) Also, it is challenging! To put two girls and one little boy in the same bedroom, as well as all their clothes and toys, has been a stretch. While I feel that it has forced me to be organized, I also am not a died-in-the-wood minimalist, so sometimes this room goes through crazy purging (normally late at night after the kids are sound asleep and I haul half of their toys off to Goodwill).

The bedroom before: great bones, just not so great a color.

bedroom before jpeg

purple bedroom before jpeg

The bedroom after:
We painted with Benjamin Moore’s Revere Pewter, which is a cross between grey and cream. I was hoping for something a little more grey than what this turned out to be, but I was still very happy with the end result.

// looking into the bedroom, with some crafts on the doors the girls made at clubs one night //

bedroom door

Because this room holds three children, as well as doubles as our guest room, we needed a double bed, and we need décor that was appropriate for both genders and for guests.

I’ve seen many darling kiddo rooms. And I’ve seen some kiddo rooms that are beautiful, but that don’t look kid-friendly. It looks like the mom is wanting it to reflect her own personal tastes rather than making a place that the kids will enjoy. Naturally, a house will reflect the style and taste of the woman who lives there, and that is okay. But I also wanted this space to be something my kids liked too. So we all gave and took a little.

I knew that I wanted a mostly neutral room, with pops of color in aqua and coral (since those two colors can be somewhat gender-neutral). I didn’t want to spend a lot of money on this room, but I was willing to purchase a few items to make the room special and unique.

The Girls’ Side

You Are So Loved pillow

you are so loved pillow and shams

The Pottery Barn Teen website had a really cool feature where you can make a virtual bed, with various colors & styles & pillows to see how you like it before you purchase. Obviously it is only their own items (and I wasn’t planning to purchase there) but it was a great resource – which I cannot for the life of me find to link to. Maybe it was discontinued? But browsing the bedding on their website gave me some great ideas.

The girls had plain white sheets on their bed, which were a little boring, so I bought some aqua rick-rack at a fabric store (the widest I could find for the sheets, and smaller for the pillowcases) and sewed it on.

rick rack sewn onto a flat sheet rick rack sewn onto pillowcases for a pop of color

It was a big time-consuming, especially for the sheet because I could not simply sew a straight line down the middle. I tried that, but after one washing the edges curled so badly I knew it would never work long-term. So I had to sew on both sides of the curved edge, which was easy enough but just took some time. The rick-rack on the pillowcases was narrow enough that I could sew one straight line down the middle of that one.

The total price for the newly updated sheets was under $10. It sure beats a new set from Pottery Barn. :) I added some pillow shams I had gotten on clearance a few years ago and the color match was perfect.

sister silhouettes above the bed

For a final touch on their bed I bought the pillow cover that says, “You Are So Loved.” I fell in love with it the moment I first saw it, and have not regretted that purchase!

And, because I simply cannot leave silhouettes alone (even four years later), especially when they are silhouettes of my own children, I made newly-updated profiles for above the bed. I made them from 12 X 12 cardstock, glued them onto canvases that came 2/pack at Walmart, and then painted the edges of the canvas gold to bring in a bit of bling. I also added the name of each of my daughters in gold under her silhouette. It was the perfect touch for above their bed, and I love it.

sister silhouettes in coral and gold

Above their bed I hung a collection of paper flowers (aqua: my mother-in-law found at a yard sale) and tissue paper balls (white and pink: tutorial here). The large white round lantern was found somewhere years ago (read, cannot remember!).

 We also replaced the old brown ceiling fan with an outdoor hanging lantern that we found at a yard sale for $5. It is also old, but it is white, and it fit in the room beautifully.
above the bed

tissue paer balls

bedroom in coral and aqua

A few little extra details: the bed was a brown wooden thrifted find when we were newly married for $40. First it was black, and more recently white. We added this decorative piece to the headboard.

headboard detail

Old Quilt at the bottom of the bed: *say it all together* thrifted

quilt from Goodwill

And lest we be deceiving, at the moment (or for the past 3 months-moments) the bed has been held up by books on one corner. It’s true! :) Books hold up broken beds wonderfully. The Nesting Place gave me permission to show the imperfect along with the beautiful. xo

honesty is best aqua throw rug

To the right of the bed, with about 4 feet in between, is Hudson’s bed.

How to fit three kids in one bedroom

Little Man’s Corner

We found an antique toddler bed at a thrift store when Zoe was a baby, and so far each of our kids have used it. It is made of solid wood, and it’s just so gorgeous! All I needed to do was clean it up, and it was ready to go. I do think it tends to look a little girly though, so when Hudson moved into it we tried to make it a manly little corner. :)

I found Little Wanderers store through Instagram, which is where I found the white cardboard deer head mount. I LOVED it, and knew that it would be the perfect statement piece for above his bed, setting it apart as the boy side. It was super easy to assemble (punch out, then follow the numbered pieces), and I absolutely love this!

the boy side

Gold frame: thrifted
White Deer Mount: Little Wanderers, source at the bottom of the post
Arrow Pillow: made by me
White comforter: throw-sized down comforter that fits a toddler bed perfectly
Bed: thrifted

the boy side of the room little boy bed

deer mount deer head mount

  deer head cardboard mount

antique headboard little boy bed

antique baby bed anitque bed

little boy corner

We put white faux-wooden blinds up on the windows, but no window treatments.
I liked the clean white lines, and it draws the eyes to some of the other places in the room, while keeping the windows stream-lined.

The bedroom also has a mantel (one of five in this cottage, isn’t that crazy?!).
However, we did not make it functional: we use it for decorative purposes only.
As cute as it might look, fire in a kids’ bedroom would just terrify me.

Beatrix Potter theme mantel

wagon in the bedroom with books

So because it started out as a nursery-turned-kids’-room, this area has a Beatrix Potter-theme of sorts. Add in some fedoras (Target’s dollar bin) and baseballs (thrifted), a painted “H” for a whimsical look, and it’s good to go.

mantel in the kids bedroom old baseballs

Okay, so this is where it get nitty-gritty practical: storage space.
Three kids in one room isn’t all rosy (other than the fact that they LOVE it).

We have one dresser (gifted by our landlord at our previous rental house), and it houses all the clothes for all three kiddos, with the exception of hanging clothes (dresses, dress shirts, sweaters) and shoes. Sooo, the good thing about this is that it forces me to be basic with their clothing because there simply is not room for each child to have lots of clothes.

There is still a changing pad on the dresser because, yes, my son is still being potty trained
(don’t even get me started on all his escapades while in the process).
I hot-glued some aqua ribbon onto the lampshade to continue the aqua/rick-rack theme,
and hung a decorative mirror.

Under the dresser are baskets: one for each of the girls to hold their shoes and socks,
and the little yellow one for Hudson’s shoes and socks.

one dresser for three kids

decorative lamp shade whimsical mantel

  mirror reflection wagon with books

Not pictured is the closet, one of three in the entire house, which holds their clothes and all of their toys (except for the white trunk at the foot of Hudson’s bed that stores the doll clothes for the girls, and the living room coffee table trunk that holds a few more toys).

It IS possible to have several children in the same bedroom. Ideal? Perhaps not. But when it is all you have, you make it work, and you make it fun and beautiful. You choose to have only the things that you really really like, and remove all else and haul it to Goodwill. :)

I’m still learning – after nine years of marriage – that home is not about being a perfect place, or having all the perfect things. With kids especially, things will be imperfect, and that’s okay. If you’re a bargain-hunter (like me), you won’t find everything all at one store, all in one day. It takes patience, and eventually, over time, you will have a unique collection of things you really love. We’ve lived in the Cottage for four years, and the kids’ bedroom is finally coming together how I like. And now within two months we will be rearranging and moving around again because of the upstairs renovation. :)

So goes life, and that’s why it’s so important to enjoy the process of homemaking, not just waiting until everything is exactly perfect before you can see the beauty. Beauty does not equal perfection. Beauty means that you choose to see the lovely, the precious, right now, today, right in the middle of what may be a mess.

I hope you enjoyed the little tour of the kids’ bedroom, and are encouraged to “fluff your nest” too. :)

signature

Sources
“You are so loved” pillow cover: Society 6
Deer/Buck Cardboard Mount: Little Wanderers
Rug: thrifted, but similar one found on Overstock

One Year at the Cottage

Today is a celebration of one year in the Cottage!

When we bought this bungalow in January of 2010, this is how is looked.

I was depressed for three days after going through this house!
It had great bones, and so much character in this hundred year old house,
but it needed SO MUCH WORK.

After four months of working on it full-time, we moved in on May 31, 2010.

It still needed quite a bit of work. :)
The landscaping looked like the above picture, even though the exterior had been painted like below.

One year later, there is still work to be done! :)
But I took this picture this morning,
to celebrate one year
of being in our dear little cottage!

After four years of being in a rental house,
being able to own our own home once again was a dream come true!


There is still work to be done, but it feels like home…. ♥
We love the little Cottage at 341 South!

~ clarita