Outdoor Living {Before & After}

If you ever come to my house and I don’t answer the front door, this is where you’ll find me:

Patio Complete 048


I never knew that an outdoor space could feel like another room in the house, but this area does. I think it’s the pergola that gives it a “room” feel, and even though there are no walls or privacy fences, I can still sit there and feel like I’m in my personal outdoor living room. I cannot even tell you all how much I love this space!!

A huge part of that loving comes because of how improved it is. If you’ve been following the Cottage blog for any period of time, you know we bought this house as a foreclosure, at a time when it needed a lot of work. The inside was our focus for the first couple of years, and finally last spring we started doing more outside projects. Our front porch was first, and then, on July 4th weekend a year ago, we started the back patio.

My husband is very careful to do things debt-free, and so we have not done some of the bigger projects around here until recently, after we were able to save up for them. So that makes the finished product even more exciting. When you wait for something, it becomes even more special! :)

This is what it looked like for the first 4 years we were here. Lovely in its time, but with many years of wear and tear the boards were rotting and falling in, and they gave many splinters to poor bare feet!

{Before, July 2014}

back porch before

deck - before


Soooo, the perks of having a husband who can do literally ANYTHING with wood are pretty awesome. He can envision something, and make it and built it. I can decorate it when it’s finished, but he’s been the vision behind most of what we’ve done here at the Cottage. He’s really great like that.

So, to give a little perspective of where this is (and there were some people who thought this is the front porch – no, it’s the back deck, off the back/side of the house :)) , this is the view from the front of the house.  The back deck is only slightly visible, so it gives a very private feel sitting back there.


cottage front view

First off: tear off the old deck, beginning on July 4th, 2014

tearing it down

The process of tear-out was quick and easy, and then the building took a bit longer because of working at it evenings and weekends for several weeks a month or two. The entire process from beginning to end, including staining the wood and all of that, wasn’t finished up until November. So! We don’t do everything super fast around here. ;)

The little man was so thrilled with his apprenticeship to construction.

little mancub daddys helper

And I even got out there with a drill – because my husband taught me to love that kind of thing too. :)

IMG_1083 IMG_1246

And things slowly started taking shape…

learning that work is fun

backporch living

The first dinner on the patio – enjoying it even before it was completely finished because we were just THAT excited about it.

first dinner on the new deck
Art time – outside! When they find me outside in the mornings, sometimes they’ll bring their own things outside and we’ll all be together for a while.

mornings on the porch art on the porch


Break time.

taking a break

And adding the final touches  – finishing the pillars, putting lights on the pergola, staining the wood, planting ferns and shrubs in planters…

I love lots of whites indoors, but out here, I wanted lush green and full of color. It feels like my happy place.

Patio Complete 032 patio pillars


{And after, July, 2015}

Unless it’s raining, this is where you’ll find me, every morning. I’ll even wipe off the raindrops from the table and chairs if I need to, so that I can use this lovely spot. My Bible, a hot cup of coffee, and quiet time outside = the best way to begin a day!

My view from the kitchen door. I mean. I cannot even resist going out there. My love of running is even being affected because I just want to BE HERE.

the patio room


morning quiet time

Patio Complete 035


French-pressed café al fresco, anyone?


cafe al fresco

And these little cuties that sleepily join me after a while… ♥♥  Sometimes it all feels like a beautiful happy dream, these moments of my life, with my precious children.

morning risers


Sometimes I can hardly believe this is the same location; same outdoor furniture, same potted plants, but a whole new design.

Patio Complete 038


Friends and visitors are welcome! :)

signature

Attic Bedroom Sneak Peak

white attic bedroom

The attic renovation is literally just minutes away from being completely finished!! It is so exciting, and both Husband and I are nearly in shock that everything is actually coming together. :) It has been a huge project, but now is the fun part – the “painting of the canvas” that we’ve created, making it into a home.

I don’t have time for a detailed post, but I’m just so excited I want to show a quick picture. ;)
Everything has come together so well; it has been so busy, but not really stressful. It’s been peaceful, even with the incredible work days, works night that have varied from 12pm-3am the past week to try to get things finished up, and final details. The little things I’ve been collecting fit exactly as I thought they would; only better. I’m so grateful for the hand of God even in things like an attic remodel!

So just for fun, here is a before picture of the bedroom:

bedroom #2

And an after picture.

  white attic bedroom

It is a magical room. I want to move in there.

More details will come later! Today is a fun one;  finishing up last minute things for the Christmas Tour of Homes that is happening tomorrow!

Have a lovely weekend!

signature

Music Room Before & After


It’s a super cozy, wonderfully lazy Monday afternoon… It’s been raining steadily all day, actually for most of the past week. Combine that with a crackling fire in the hearth and I’m ever so happy. No snow this far south, but if it’s raining and I can have a fire, I’ll be happy. :)

I’m been wanting to do some more before & afters of the Cottage, but somehow it has taken me a while to get those pictures taken and uploaded. And with two active little girls, I find my computer time to be a bit lessened. Combine that with a New Year’s resolution [but wanting it to continue past just this year] – the goal to not be on the computer after dinner in the evening.

That’s been a stretch for me, I’ll admit. I didn’t realize how often I go online after supper. It was a good, easy thing of relaxation at the end of a busy day, but the down-side of that is that I could easily check out with Ben and the girls during our only family time of the day. And honestly, if Ben and I needed to talk through something, I could easily hide behind the screen instead of talking… :( So, I very much realize this is just my own choice and not something that’s for everyone. This is just for me. And if Ben is gone for the evening, don’t be surprised if I’m online at 7:30P.M. :)

I have found that I have SO much more time for reading than I normally did. It’s only the first week of February, but I’ve already read several books this year. I don’t have to wonder long where my free time was going… But we’ve been having so much good family time. Hide & Seek with the kids that is way more fun that being on the computer. Reading them lots of books. Feeling like I have a lot of time in the evenings…

And besides all that, I don’t want this blog to be all about my projects and my house and my… What I DO want it to be is an outlet for me to remember details about life and God and family and living and creating that I wouldn’t otherwise remember. To celebrate and treasure the little things. The not-often big things. To share a part of my journey with other people. To try to respect the privacy of my family at the same time…

And a great blessing that comes along with that is keeping current friendships in far-away places as well as meeting many new wonderful friends! Truly, I feel so RICH in friendships!!

So, today is a post to document the Befores and Afters of the Music Room/Family Room/Office.

Before:

[bright yellow/orange walls, but really in good condition otherwise]

before 4

[for better room flow, we moved the door to the left of the fireplace…

before 1

… to the right of the fireplace]

before 3

And After:

We began by painting the walls a neutral color, the same as most of the rest of the house. I wanted to go with a paint called “Biscotti” because how fun would that be to tell people the wall color?? But it didn’t quite fit the pallette I was wanting, so instead we went with “Tuscan Beige” by Ace Hardware.

This room is a walk-through room to the girls’ bathroom, the laundry room, and the master bedroom. We thought about closing part of it off to make a third bedroom [at present we have only two] and putting a hallway through it, but because of the option to add two bedrooms upstairs eventually, we decided to keep this room opened up. Besides, closing off the rooms would’ve meant getting rid of my baby grand, and that would’ve been a very sad parting…

When I was getting ready to work on this room last summer I asked on facebook if anyone has some old sheet music they weren’t using/would give/sell. My friend, Marylou, offered to send me an old book. It was a gem – I was so thrilled upon received it! Not only were the pages a very lovely aged color, but the titles of the songs are so delightful! Thank you so much, Marylou!!

before 2

after 6

I combined this old music with new books that I got off ebay for a song [yeah, didn’t even think of the pun, sorry]. And I kind of went a little happy with all of the music projects. I told someone I feel a little sheepish even showing this post because it’s a music overload!!

I began by putting these various sheets over the wall by the desk.
[This idea came from French Larkspur [blogspot], not original with me.]


after 5

Can’t forget to include this in the pictures. :)

T-4

The desk we picked up at a yard sale for $10, and then I painted it several years ago. That was when I was painting everything black. Now I realize there ARE other colors to paint things. :)

The chair was free at a yard sale last summer because the caning in the seat is coming apart, and we still haven’t fixed it. Hence the pillow to sit on while working at the desk. :)

The window panels I made from fabric that I bought for $1 a yard several years ago. I really wanted to go with a bright grass green for my accent color in here, but couldn’t find what I was looking for for the price I was willing to pay. So I ended up using some fabric from my stash….

This old [bald & hairless] rocking horse came from an antique auction. I used to think he was dreadfully ugly, but he’s growing on me. :) The girls love him, so why shouldn’t I? Beauty is in the eye of the beholder, they say. :)

The jute rug I picked up on craigslist, the same time I got the rug for the living room.

after 3

Christmas decor, 2010 056

Turn right at the desk and this is what you’ll see…

f-r 14

The old piece of furniture was bought as-is at my grandmother’s auction 5 years old. It badly needs a new paint job, and I’m not sure whether to leave it black all over, or paint the exterior white and the inside black? This room tends to be rather dark, even with the two windows.

family room 1

White vase: Pottery Barn outlet for $1.99. Wish they’re still have cheap clearance like that.
Old Frames: auction for $1-2 dollars each
White bust: T.J. Maxx, I think
Quote plaque: gift from a friend ♥

A Christmas to Remember 6

I love bringing the outdoors inside. This mossy stuff is so beautiful to me!

Keep going clockwise, and watch out for the baby grand…

This was my birthday gift from Ben when I turned 24… I am a very humbly proud owner. :)

f-r 13

I got this wild idea to make a music tree [as if there wasn’t even of a music theme in the room]. So one afternoon when the girls were napping I traced an outline on the wall, then cut various music sheets to fit that outline. I thought it would take me days, but an afternoon was enough to complete it.

The bird cages were found at several different junk shops.

f-r 4

f-r 15f-r 5  

f-r 10f-r 6

f-r 3projects - oct. 2010 014-1

I bought quite a few books at my grandmother’s auction several years ago, along with these binoculars, which belonged to my late grandfather.

The round votive holder is from Pottery Barn – something I had watched in the catelogue for a very long time, starting out at over a hundred dollars, and finally finding it at the outlet for $30. I was happy. :) That was several years ago. Now, I think it’s a little “heavy” in style, but after waiting that long to buy it and then getting it for such a good price, AND storing it for several years until I had a house to put it in, well, I’m not selling it quite yet. :)

The 4th mantel/fireplace in the house. Not sure black is what it’ll always stay, but because I have so many fireplaces I didn’t want them all to be the same. So this is black.

family room 2

I call this my “Wall of Words” inspired largely by The Lettered Cottage’s reading room. Theirs is only words, if I remember correctly. I combined words, music, pictures – just a lot of things black and white. [whoops about the one picture falling from its frame]

after 4
The black frames were mostly bought at Goodwill for around a dollar each, average, and I spray-painted them black. When my sisters spent some time with me last summer, I conned them into doing some of the writing for the quotes I wanted on the wall. :) I used a combination of Scripture and some favorite quotes. The wall words were given to my by my mother-in-law, who found them at a yard sale! She is a yard sale queen! :)

after 9after 7

after 10f-r 7  

after 1after 8

This old globe also belonged to my late grandfather. Can you tell I’m sentimental? :)

f-r 11 

f-r 8

And just for fun, before and after again:

before 4

after 5


before 1

f-r 4family room 2

after 4

And that concludes the Office/Music/Family room before & after!

after 11

[disclaimer: these pictures were taken during the naptime of two children. Should you happen upon us today, or any day for that matter, there is very little chance of the above room looking remotely similar and tidy. At the moment, there is a dishwasher-sized cardboard box in the middle of the room which is the “house” of the above-mentioned children and they would be disastrously devestated if the house would need to relocate anytime in the near future.
(p.s. the mother of the above-mentioned two children is learned and growing in the areas of letting children be children without demanding that messes be non-existant and playtimes be solely imaginary and with no fun props. Hence the cardboard house, which is stretching the imaginative developement of the children, and the perfectionistic tendencies of the mother, who is learning that happy children are worth far more than perfect houses, and that imaginative play is what will create wondeful memories rather than immaculately-tidy rooms].

~clarita


My Kitchen at the Cottage {before and after}

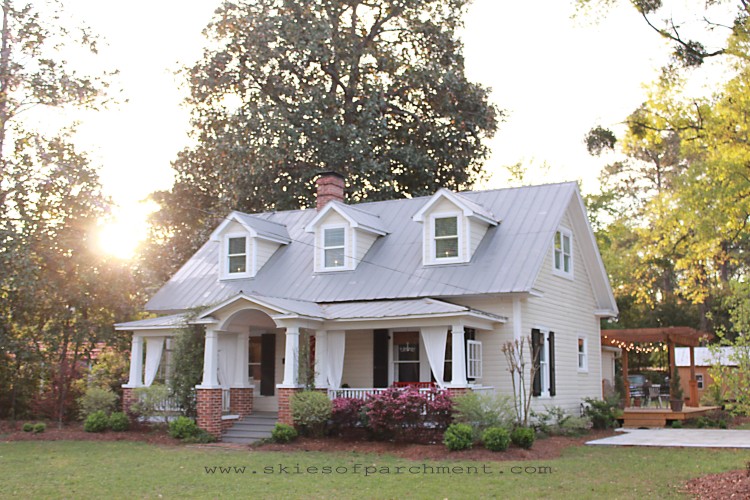
This house has been a dream come true for me. After renting a rather dark and what felt like gloomy house for almost four years, I have been so delighted to actually have our own little home! Yes, it’s little. Only two bedrooms, about 1500 square feet altogether. It’s little. But it’s oh, so cozy. And so full of natural light! I LOVE that.  And there is no landlord that says what we can or can’t do. :) Poor husband, now that his wife is let loose!

I felt really stifled in that rental, but you know, I think it was really good for me. For one, it makes our own house so much more special. And two, I think I learned creativity and contentment in a whole new way at the rental house. It wasn’t a natural cute house, so it took a lot of effort to make it cute, without pointing out all the unattractive things about the house. It was a real stretch especially in being content. I can’t say that I mastered that area, but I do feel like the Lord really helped me grow in that. And I keep growing even now.

I think the kitchen in our new house is one of my very favorite rooms. Yeah, well, they’re ALL my favorite. :) But this is especially a favorite. A lot because our rental house had a very very tiny galley kitchen in the middle of the house – no windows, only an overhead florescent light, and if more than two people were in the kitchen it felt overwhelming.

My new kitchen still isn’t large, but most standards. But to me, coming from a teeny kitchen previously, it feels HUGE!

First impressions, though, weren’t very pretty. It was almost the exact colors that were in our rental. Yuck!

BEFORE:

In the middle of January, in 30′ weather, this was very depressing. I had a hard time seeing potential in this place!

Kitchen before 3

Kitchen before 2

Kitchen before 1

Kitchen 38

Brown and yellow put together may come back one day, but I dare say it will not be for me.

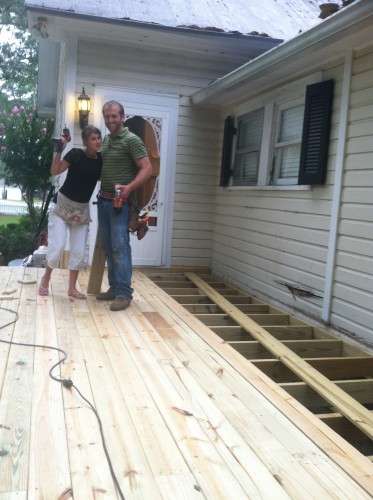
We tore out some walls in between the kitchen and dining room and living room. It made the front of the house seem twice as big, and so roomy and spacious. The kitchen was probably the most work out of any other room in the house.

THIS was my kitchen inspiration photo. I think it came from Better Homes & Gardens. My colors and basic theme came from this.

Kitchen inspiration

Of course there are differences   that and MY kitchen – they are two totally different houses! So here’s my version… That cool flooring went in a bathroom instead of the kitchen.

So this is AFTER!

Entering the kitchen from the living room and dining room… Ben added these beams, which came from an old house locally.

Kitchen 6

The hardwoods were refinished, along with the rest of the house. I love the painted floor look too, but it wouldn’t have worked well with our open floor plan.

I made these 12 X 12 burlap squares, thinking they would go by a fireplace, but they seemed to fit here. These are words that describe what I want our home to be like: lots of love and affirmation, peace and comfort and rest, and lots of fun and joy.

Kitchen 35

The chalkboard in the kitchen was an idea I had wanted since years ago – partly for looks, because I think chalkboards are awesome, despite their ever-growing popularity, and partly because supper time can often be a crazy time of day at our house, and I thought this would keep the girls entertained instead of following me around every inch of the kitchen.

If you look on the first picture, it says, “Let’s celebrate Ben!”, from his party back in August. (see how long ago I shot these pictures?) But it’s covered in little scribbles. So yay, my hopes for this area being child entertainment are fulfilled!

Plus, it’s one of the first things you see upon entering the front door, so it makes a fun way to welcome guests!

kitchen 1

For the top of the chalkboard, I dry-brush painted two metal grates that I had found at an antique shop years ago, then tied jute string from one end of the other and clipped pictures of our friends onto it, wash-line style.

Kitchen 5

Entering the kitchen a bit more… Having a window above my sink is dreamy!

And can you believe that Mr. Husband surprised me with this apron-front sink?? I could scarcely believe it when he told me. This is what I really wanted in here, but gracious, they’re expensive. So this is my birthday and Christmas and birthday and Christmas and birthday and Christmas gift for the next decade. :) We tried to justify the $$ because we really didn’t spend that much on the rest of the kitchen. :)

Ben added crown molding on the ceiling, and also on the top of the cabinets to make it look like staggered heights. This side is existing cabinetry, with the doors removed on the top half. We did order all new doors for the kitchen. [side note: we ordered them online instead of in-person, and they were way too “fussy” in real life. I would have preferred something a bit simpler had I known].

The chandelier was a $7 auction find.

Kitchen 7

A close-up of the apron-front. I love this baby! Not only does she look lovely and old and vintage-y…

Kitchen 33

… and fit so well with the butcher block counter top that Ben made out of old 2×4’s out of walls torn out of the house [isn’t that just precious??]…

Kitchen 34

… but it was perfect for bathing little children before the tub was hooked up…

Kitchen 36

… and it’s a perfect height for a little girl who loves to wash lettuce and is always asking to help in the kitchen.

Kitchen 37

One more peek at her. :)

Kitchen 17

Quite frankly, there is nothing I don’t love about this sink!

I chose the rainy-day blue color because I wanted a cool-feeling kitchen. The color is “Kittery Blue” in eggshell finish from Benjamin Moore, but we mixed pure white with it as well to soften it – the color was too bright blue for me.

It is so hot so much of the year where we live, and i didn’t want a “hot” color to where i’d feel like i was roasting along with my dinner. I think this is the reason I chose cooler colors throughout most of the house, which is quite unlike me, really. I have always loved COLOR. And now I still like color, but more splashes of color than rooms of color. Even though I still people’s bright colors and think to myself how lovely it looks and perhaps i should have done that too… :)

Details in the window cupboards… Wanting it to feel cozy, not sterile (though definitely clean!).

I love my open cabinets. It feels so comfortable. Not sure why, but it does. And guests know where my glasses and everything are. No opening five cupboard doors before finding the right one!

My open cabinets were inspired by The Lettered Cottage and A Country Farmhouse in particular, and a few other magazine sources.

Kitchen 13

I had so many white/silver/glass dishes, so I didn’t go out and buy many at all. I did add a few little things I found for a dollar or two at junk shops.

Kitchen 12

Fun little cups I picked up at my favorite little junk shop. These are our chocolate milk glasses. :)

Kitchen 4

These are my fave. So sweet and cute.

Kitchen 23

This mirror was randomly placed here soon after we moved, when we tried to clean up the house one day to get ready for guests. And what do you know, but I really liked it there. So it stays! I dry-brush painted this gold frame, and I love how it made the molding stand out. This is also my little picture board while I’m washing dishes. Seeing happy faces while I’m cleaning up seems to make the job happier!

Kitchen 15

Kitchen 3

This reads, “peace. It does not mean to be in a place where there is no noise, trouble, or hard work. it means to be in the midst of those things and still be calm in your heart.” [unknown] I so often need this reminder!

A container [found at Goodwill – does anyone even know how much I love Goodwill??] filled with glass vases. Sometimes this is emptied out and used at a salad bowl for company. And sometimes the vases are gone and scattered all over the house, holding various flower arrangements and buds.

Kitchen 29

And the third fireplace of the house is in the kitchen. Believe it or not. I can’t wait to use it in the winter! I think I will actually like cooking and baking then!

Kitchen 11

Little girl who follows me around the house while I shoot pictures. :)

Kitchen 10

Kitchen 9

And another look I’ve had on this mantel. It’s fun to change it around a bit, but I know I will not be one of those people who changes their mantels every single season. Because, with 5 fireplaces, that would be 20 different mantel-scapes, and I know is not going to happen here!

Kitchen 31

Kitchen 32

My baking corner. Pretty much all I need to bake with (pans, mixing bowls, ingredients, beaters, refrigerator) is within arms reach.

Before & After 033

Ben also made this concrete counter top. Yeah, he can do pretty much anything he sets his mind to. It all started when we began pricing new counter tops, and were blown away with how expensive they are! My ever-frugal husband began thinking of alternatives to the classic counter tops, and decided to experiment with this. The only cost was a few boards to frame up the counter top and the concrete to pour in it. Very very inexpensive.

People that make concrete counter tops as a business must have formulas and things for different colors. We didn’t, so it was pure experimentation. He added some black dye in the concrete when he first made it, but it only turned it a light grey, and we both wanted a charcoal color. So he rubbed ebony wood stain on top after it was dry, and then sealed it. It turned to the perfect color. I think he’s a genius. :)

Now that we’ve lived with it for a while, I still LOVE it. However, we would go with grout sand rather than concrete sand. It would make a smoother finish.

We searched online for “DIY concrete countertops” and found various blogs and tutorials.

I love the practicality of it as well – my pans can come directly out of the oven and be set on the counter.

Kitchen 25

Ben took away the old yellow vinyl and replaced it with beadboard. I really like this look.

Bamboo and white tongs in one jar, black and stainless steel in another. I’m funny about that.

Kitchen 28

A flat-top stove! Very, very exciting after my vintage model at our rental. :) I kept trying to tell myself that “Hey, vintage is cool!” but I wasn’t able to convince myself. A flat-top feels so clean and I have been loving it! We did get all new appliances in the kitchen.

Kitchen 8

Can you believe that my dear friend Linda found this at a yard sale for TWO DOLLARS, and GAVE it to me?? I couldn’t believe that she didn’t keep it for herself!

Kitchen 2

And now after seeing my perfectly clean kitchen, looking like it’s never used, I’ll clear up that illusion and tell you that this is what it looks like quite often. Almost daily, in fact. Except without the cookies.

Ben made these cabinets on this side, but we ordered doors.

Kitchen 18

And now you know that I live in a real world. :) Yes, I realize it does not look safe for my children to be on the counter. But if you only knew how happy they are to be up there with me, you’d allow it too. And yes, I do stay close by. Except when taking pictures. :)

Once more, before:

Kitchen before 3 Kitchen before 2

And

After!

Kitchen 24

[I think a round jute rug would look so very cozy right in the center of the kitchen, but where do I find one for super cheap??]

Kitchen 7

Kitchen 34

Thanks for taking my little long tour!

~clarita

Sources:
Farmhouse Sink: signaturehardware.com


Blue wall color: Kittery Blue; Benjamin Moore, in eggshell, mixed half/half with pure white trim paint [edit: this is discontinued. the closest thing I could find was ‘Harbor Fog’ by Benjamin Moore.
This Harbor Fog would not need to be diluted or altered; it’s the closest match to the finished wall color that I could find.]


Butcher Block Color:   Waterlox (a food-grade sealer), multiple coats, no poly

I’ve gotten a lot of questions about the butcher block countertop through messages, so I’ll answer a bit here:

The kitchen butcher block countertops are made from reclaimed Antique Southern Pine. We then used only Waterlox, multiple layers (like 4-6!) because poly isn’t food-grade safe. The Waterlox does give a water-proof sealant, and also a bit of natural color although it’s not considered a stain. We didn’t use any color/stain on the countertops. The amber color came because of the Antique Pine and combination of Waterlox.


Cabinet color: Dove White, by Sherwin Williams


Floor Stain: Dark Walnut; Minwax


Cabinet doors: cabinet door world

Dining Room {before and after}


Or perhaps I should name this,  “Dining Room Before. And After: Prepared for a Dinner Party”. That’s too long for a title anyway. But that’s the gist of these pictures. I was going to do before & after pictures of this room anyway, and then during preparation for my husband 30th party I snapped these pictures. And no, my dining room is not set up for a dinner party every day! :)

It has been SO FUN to decorate this home on a budget. Other than blinds/shades for the windows, and light fixtures, I tried to not buy much at all to decorate with in this house. Unless I made it myself, then I allowed myself to buy items to make it with. Or found it at Goodwill, or a cheap antique shop, or something. You know, where I could justify it. :)

I was thinking the other day, and wondering what this house would look like if I would have had unlimited resources to work with. But then I thought some more, and said to myself that I think it would not look much different. I might have shopped at high-quality, high-dollar antique stores, maybe. But I think the basic look would be the same. But then that’s today. It seems like “my style” [whatever that is] is always emerging, developing, changing… :)

Because, I like uniqueness. Originality. I like it that I didn’t just walk into a store to buy my stuff, and that a lot of things here are unique to me, and to this house. I like to make a lot of things, because that makes it more unique. More one-of-a-kind. That’s just what makes me tick. :)

So, not sure why I said all that before a dining room, because there’s only so much a girl can make for a room like that!

But here, it is.

Welcome to Room #2 of the house tour.

BEFORE:

There were walls everywhere. These were the first to go. The rooms are quite small even without the walls now, but it makes everything *feel* so much bigger. If you can trick your mind like that your comfort level is much higher. :)

Dining Room Before 4


Behind that wall in the first picture – in the tearing out process.

Dining Room Before 3


Fireplace #2 of 5 in the house. Blue paint is not original to the house, so I didn’t ruin historic value in this century-old house by painting it!

Dining Room Before 1


Lovely blue trim. And I didn’t get a picture of the ceiling, but it was a light sky blue too.  Someone really liked blue, is all I can say!

Dining Room Before 2


And AFTER!

[if you remember from the living room post, this is opening from one side of that room]

Dining Room9

I found the bike/bakery shop/flower pictures before we got married at Michaels or A.C. Moore. My grandmother framed it in an inexpensive frame, then had a friend glaze it to make it look like an oil painting, but it’s really a cheap poster.

We painted the fireplace mantel and brick under it a pure white, and I love the fresh look that it gave!

Dining Room 5


A few antique-joint finds on Saturday…

Dining Room 4

These paper balls were hung especially for the dinner party. My theme in decorating was “Garden Party Indoors.” I looooove outdoor parties, but it’s just not possible here most of the year. 100 degrees and 100% humidity for an outdoor party just isn’t very enjoyable. I tried it one year, and dripping sweat and buzzing mosquitoes just wasn’t very pleasant. Trust me on that one.

This was a little challenge for me to know how to pull off my theme without it being too girly for my husband 30th party! Afterward I kept asking him, “This wasn’t too froufrou for you, was it? It wasn’t too girly?” And he kept assuring me that no, it was good. :) Although when I mentioned keeping those paper balls up there permanently he got a little scared and said he might have to find another place to stay. :)

Martha Stewart gets the credit for the instructions on how to make these balls. I had read tutorials online, but was thoroughly confused. Martha Stewart to the rescue. In three easy steps I had made these balls and was so delighted! I would have made hundreds of them by now if I would have known how easy they are!

This girl has made something similar, only in flower shape, that are so beautiful. She was a main inspiration for me wanting to make these in the first place!

Dining Room6


These window panels were inspired by Pottery Barn Teen. A few friends and I were looking at a catalogue one day and said, “We have got to make these!” I found fabric on clearance for $1.50 a yard, so spent about $20 for fabric and thread. I made these with a different twist than the ones Pottery Barn sells, but got my idea from them.

Dining Room 12

The Pottery Barn price was $68 per panel. Unbelievable difference. :)

The wide trim was present in the house when we bought it. I LOVE it.

I cut bamboo rods for curtain rods for these panels, like the ones in the living room. This saved me about $50 doing that, because these were free from our old backyard. I did have to buy the brackets to hold the bamboo rods, which ended up being about $10 at Home Depot.

The bamboo Roman Shades come from Kmart. I love this purchase. I think it really dresses up the room, and I love the different textures and media.

This old door was in the house as a laundry room door when we bought it, but in too poor a condition to actually use. I couldn’t  bear to throw it away, and one day had the inspiration to put it in here. The chalkboard dresses it up a bit, and is a fun place to write notes, menus, or inspiring quotes.

Dining Room10

[yikes, should have pulled the dead leaves off my “friendship plant!”]

This chandelier was a bargain I found on craigslist. (I know, right?! Who could even bear to part with this kind of beauty?)  It’s the Pottery Barn ‘Celeste’ which was selling for far less than store/catalogue price. I was one happy girl to pick this baby up! And I was trying not to appear over-eager as I handed her the money and drove off, totally beaming!!! This was one deal I couldn’t BELIEVE I actually found on craigslist. I loved the bit of glamor it added to the older historical elements in the room.


Dining Room18

Dinner Party Details:

Dining Room8

Dining Room16

The centerpiece was three simple green arrangements. This was just an elephant ear leaf in a milk glass vase. I love milk glass. My Aunt Grace has collected them for years, and the past three years I’ve picked up pieces as well when I find them cheaply.

Dining Room15

This potted arrangement was given to me after a dear friend’s wedding. Isn’t it beautiful?!

The vase in the background is filled with magnolia leaves and an old magnolia flower pod.  Also in milk glass.

Dining Room14

More paper balls:


Dining Room 2


Dining Room 1


Place settings:

Silver chargers were found at garage sales and discount stores, for around $1-2 each.

White place settings: Pottery Barn outlet, on sale. They’re called “Suppertime.” I purchased a set of 10 dinner and salad plates with a gift card given by husband a year and a half ago. I LOVE these. They feel special for everyday, but for a more formal dinner they look the part as well. And they hold up splendidly with years of use.

Goblets: you can find these for $1 each at Dollar General. Walmart, Pottery Barn, and other places sell them as well, for a bit more money.

White cloth napkins: found at garage sales, goodwills, re-use-it shops.

Dining Room 19

Dining Room8

Mix-matched chairs. The table set was a wedding gift given by my parents, but for a larger party I have to pull out every chair I have around the house!

Dining Room17


Before & After 0411

And can you believe that I forgot to take any pictures of the actual party?! No food or people pictures. Sad sad sad. I was feeling very scatterbrained at the last minute. That’s my excuse. :)

Here’s the final before:

Dining Room Before 2

and after:

Dining Room7

Dining Room6

Hope you enjoyed the tour!

Wishing you all a lovely day, wherever you may find yourselves… Feeling a bit somber this week, thinking of my sweet friend who suddenly lost her father a week ago. Tragedies like that always remind me to hug a little tighter, tell people that I love them more often, and just put life in perspective so much. I ache for my friend, who has to find a new normal, and learn to live without someone who has always been part of her life.

And while I hurt for her, I’m reminded, for myself, to treasure today. Even if my kids are cranky. If they spill pink nail polish all over the floor. If they cry over every little thing. If they won’t take long naps. If they put flour in the sugar container and sugar in the flour box. If it feels like I just can’t sweet my floor enough, it’s always dirty from kids’ crumbs.

Because those are all just inanimate things. Just things. And these years of raising children are such a small part of the time span of my life. So love them well, Mrs. Yoder. Kiss them, and hug them, and laugh instead of getting upset, and take time to read that same book for the hundredth time. You don’t know how long you will be able to hold them, and cuddle and kiss them. You don’t know, so treasure today…

~clarita