There are many people who know how to make their own wreath for the holidays, so if you are one of those, just skip this post. :)
For those that wish to know how, here’s a little tute.
Wreath-making is a bit sentimental for me. My dear Aunt Freida taught me when I was a young teenager, and I remember her going outside with me to gather greens in the bitter northern wind, our fingers numb with cold, and then going indoors and she showing me how to make her beautiful creations. She was known for them, along with many other things she loved to do.
She was a creative genius, my Aunt Freida. Her home was always so welcoming, so fresh and creative, and yet more of a whispering beauty than a shouting “look what I did.” She was gentle and lovely, and I know she makes Heaven a more beautiful place now, these 8 years. But when I make wreaths, I always think of her.
Because of her, I so love the fresh greenery, and the scent of pine as you walk by the real greenery. And this year is no exception; I love the real greens as much as ever!
This is how she taught me….
One:
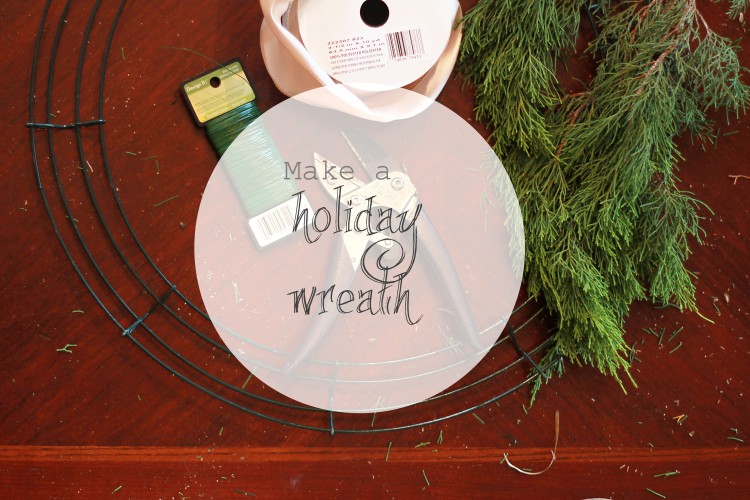
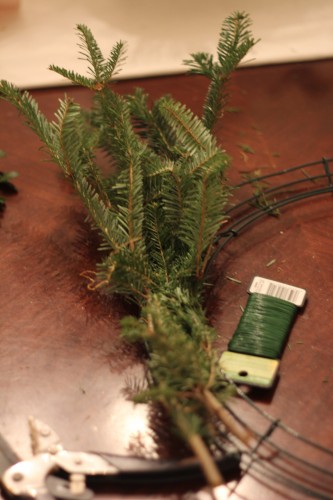
Gather your supplies:
- Wreath form (available at craft stores)
- floral wire
- snippers (what do you call it?!)
- winter greens
- ribbon for accent, if desired
- pinecones & ornaments, if desired
[If you live in the city and don’t have access to fresh greens (like me), you do still have options! A kind friend from church cut two large paper bags of fir clippings for me, and then I went to several Christmas tree stands and asked for their “extra clippings.” A lot of people must do this, because they knew exactly what I was asking for and gave them away free. I also purchased a 6 -foot garland of long-needle pine at $1 a foot.)
Two:
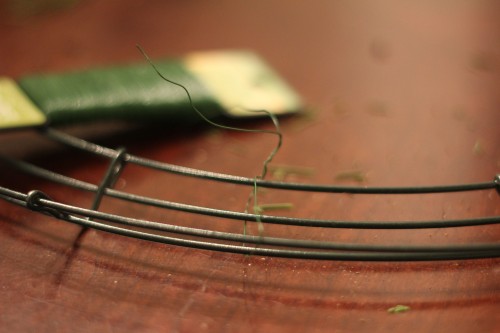
Secure the wire on the wreath form.
Just twist it around the form, and secure by winding the end around.
Do not cut the wire.
Three:
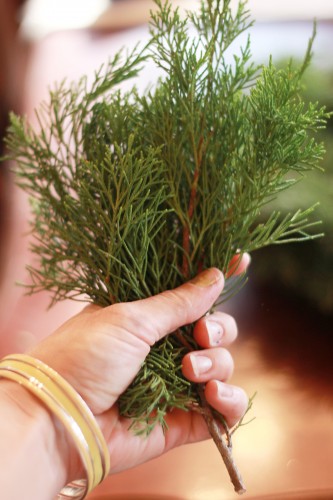
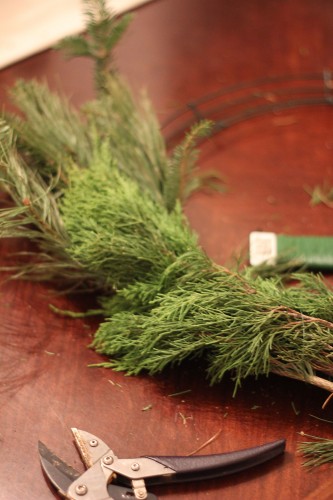
Add a small bunch of greenery, and repeat.
You’ll want the pieces to be no longer than 12 inches for a wreath that fits a door; and smaller if you are making very small wreaths.
Hold it tight against the wreath form, and wind the wire around twice. Add the next bunch of greenery a few inches down from the first bunch, making sure to cover all stems well.
[Again, do not cut the wire. It makes it so much easier if you simply keep winding the wire the whole way around the wreath, rather than cutting and securing each individual piece of wire.]
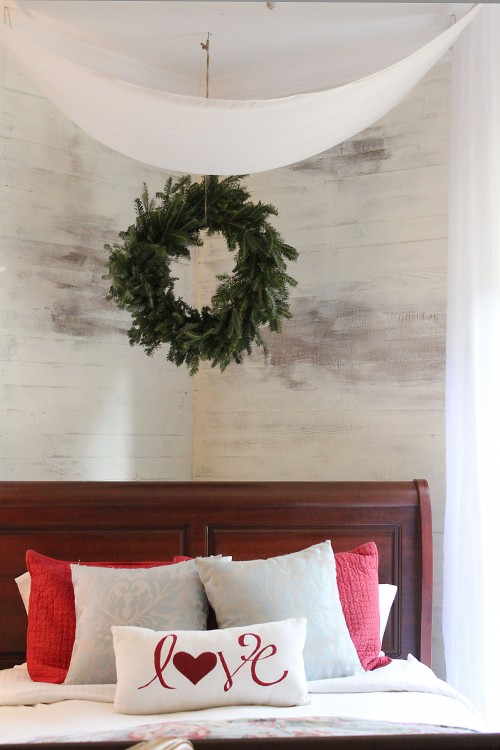
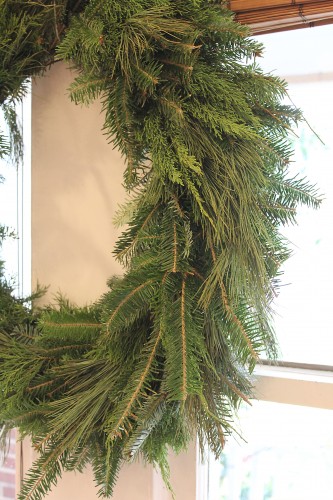
For this wreath, I used three kinds of greens: fir, pine, and what I call “Christmas tree pine” which is actually a Fraser fir. I love the textures of them put together, but you can use any kind of wintery green or boxwood – using only one kind, or mixing as many as you like.
I did a small bunch of Fraser Fir, long-needle pine, and fir (similar to Leland Cypress), in that order, and repeated until the wreath was completed.
4.
Finishing up.
When you near the end and cannot add another bunch without overlapping the very first bunch, tuck the stems underneath the first bunch, and secure tightly with wire. Now you may cut the wire, after making sure it’s secure. :)
Add any ornamentation using 10″ pieces of wire, or enjoy the beautiful natural greenery.
Hang using a wreath hanger, thin rope, jute, or many other choices.
Enjoy!



So beautiful,Clarita! I’ve been wanting to do this for a few years now. I’m just afraid it will end up making a huge huge mess with those little needles dropping off. What’s your experience? How long do they last? I usually let my Christmas/winter decor up until February or March. I’m thinking it probably would last a while longer if it were outside on my door in the cold,right?
Hi Crystal! Well, you are right – because it is real greenery it will shed eventually. In my experience the greens last longer outside – especially if it’s cold – than inside. I usually plan on leaving them up for about a month because they start looking wilted or dried out, and then I go around with a trash bag and vacuum cleaner. :) If you are wanting something to last 2-3 months then fresh greenery probably isn’t what you’re wanting. But you could always add a small touch. :)
well since you made it look and sound so lovely…today my kitchen table was filled with greenery and wreathery :) oh and thanks for the wonderful tip about getting the clippings from christmas tree places. I was a bit worried about having to take my little people out in the woods in the cold ,snow and ice to find stuff so that all worked out perfectly! I went to Home Depot. And then a few minutes later I went to the grocery store and they had a little swag of a few branches tied together topped with two pine cones for $8.99! I laughed and felt like the Queen of Thriftyland knowing that I had just gotten a trunk-full of pretty much the same thing for free!
That’s so fabulous! And cheers for getting free greenery. :)
it’s lovely!!!!
Thanks, Bek! xo
i was just admiring a few wreaths that my friends have made, and was wondering how in the world they did it :) thanks for a great tutorial!
Now you know! :) It’s really quite easy!
So lovely! Oh and your slip cover on your couch! Did you make it? Or did you purchase it somewhere? I have been pondering all the options of slip covers. . .
Hi Brooke! I did not make the slipcovers… I do sew, but slipcovers take sewing to a level I’m not quite willing to try for. :) I was so excited when I found these Pottery Barn slipcovers at uglysofa.com for a super price. It’s an overstock online supply, and they can’t market that they are Pottery Barn, so look for “Brand X”. But they even came in the real-deal PB packaging and everything. I’ve washed them many times and they’re fantastic. It’s been a great purchase!
I love this tutorial and your memories of your Aunt Freida. Marla showed me how to make wreaths this year with a wreath maker, although the same principles apply when wrapping with wire as well. It feels so festive to make one’s own wreaths! Tho I have to admit that a plain $8 already-made wreath doesn’t seem unreasonable at all to me anymore after the work of searching for and cutting the greens we needed, plus spending the time making the wreaths. (Can you tell I like to dabble in DIY crafting, but still like to cheat and BUY things too!?) Anywho~thanks for this and I know I will reference it from time to time!! You are my DIY hero. For real. :)
I need to google what a wreath maker is! :) And yes, the clippings of the greens is the longest [hardest, coldest] part of it all! It was so easy for me this year because of just picking up extra greenery at Christmas tree places, but if you collect your own it does take a while! But now you have the satisfaction of making your very own. :) But for real, this year I was low in greenery and couldn’t find as much as sometimes, and I very nearly bought a real one too. Sometimes that’s just as good. :)
Did you know Lowes actually throws away the extra greens they clip from their Christmas trees when a customer purchases one? Great place to collect free ones! :) Or better yet, you should come to my place, this property is lined with evergreens! We could try to get in the Christmas spirit together & make wreathes! :)
I wish we could get together and make fun Christmas things too! And I didn’t know that Lowe’s does that, but I think almost any place that sells Christmas trees gives their clippings away. So great!
Love this! I just put up lots of greenery in my kitchen yesterday for the first time ever and I love how it looks! We’ve been here for over a year (shhh) and there are still no kitchen curtains so I put greenery all along the tops of the windows and it looks so festive and pretty! I keep thinking THIS year is the year I will try to make a wreath, but I keep forgetting to buy a wreath form. Adding it to my shopping list right now! Thanks for a great tutorial! I love the way you used different kinds of greens to give it texture. So, so pretty! Oh, and I’ve never brought cut greens inside before because I’m always afraid they’ll drip sap all over everything. Will they? And if they do, what’s the best way to clean it up?
I have never had any sap drippings… Maybe different kinds of trees are different, but I’ve used many kinds over the years and never have had any trouble! The greens themselves dry out and start dropping their needles after a few weeks, but a vacuum cleaner picks it up in no time. :)
My comment from yesterday did not work. :( Anyway, I’m so glad you shared this, I’m going to do it!
thanks for sharing how you make your wreaths. I’ve always used a ring and a crimper to make wreaths and hand tying them scare me! But you make it look very easy… I just may have to try it this way sometime! =) There is just nothing like the smell of fresh greens… love it!!
Love this. Made my first one for last year and i’m hooked. this year I found some kind of greens (don’t know what they are called) that have blue berries on them and they are simply GORGEOUS and I can’t get enough. I was bold enough to ask the homeowner if she’d mind if I cut some and I was MORE then happy when she said, “cut all you want.” be still my beating heart. :) wish I could send you some.
I think I know exactly which little green berries you’re talking about! The greenery is so lacey, right? My parents had a tree like that and we’d nearly strip it bare every Christmas. :) I love that kind so much ~ enjoy it for me!
Very nice! I did a few boxwood wreaths this year, and every yearI ‘intend’ to make a whole mess of everygreen ones for the windows on the house, but alas, I usually run out of steam about…right now. :) and then there is always next year. We are over run with evergreens so they’re not in short supply, like my energy level. :)
I would love to do boxwood wreaths – they are so beautiful and elegant! And all your evergreens around the property make me turn green. :) Your house must be so festive!
I have a ton of clippings left in the garage- now I know what I’m gonna do w them!! :)
Beautiful job, Clarita!
Have a super weekend. Loves-