Outdoor Living {Before & After}

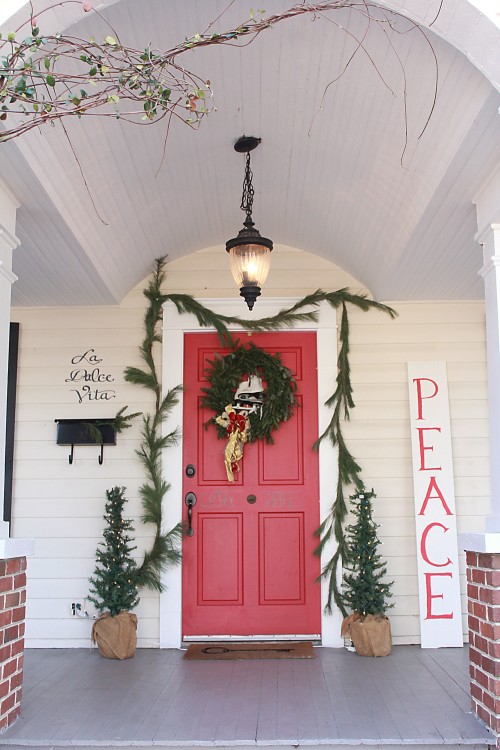
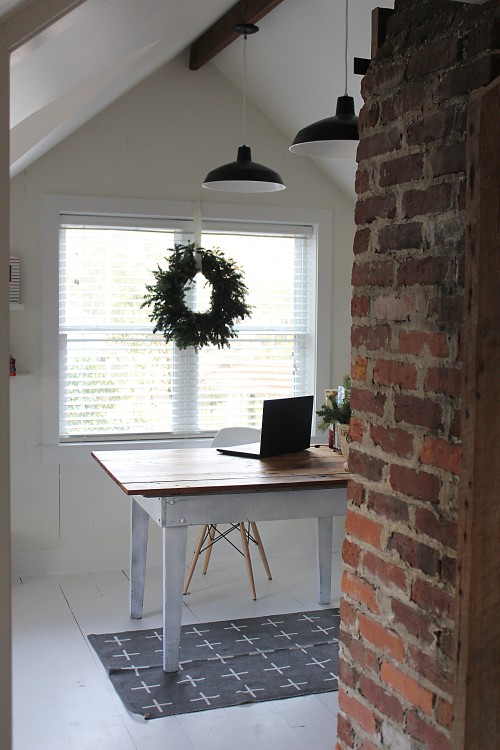
If you ever come to my house and I don’t answer the front door, this is where you’ll find me:

Patio Complete 048


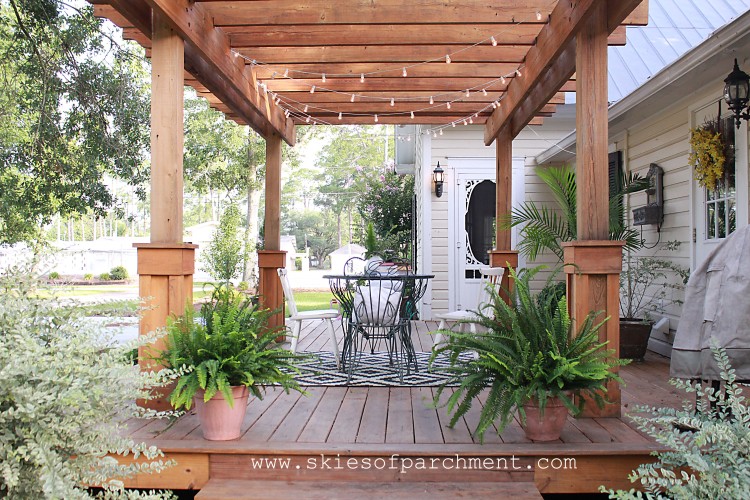
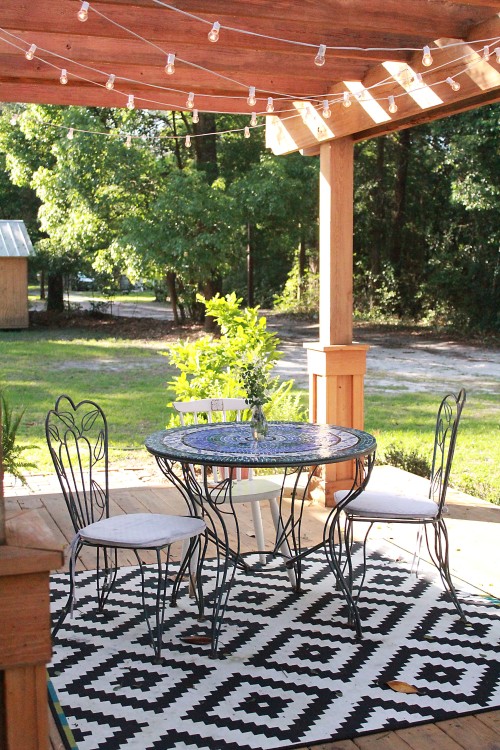
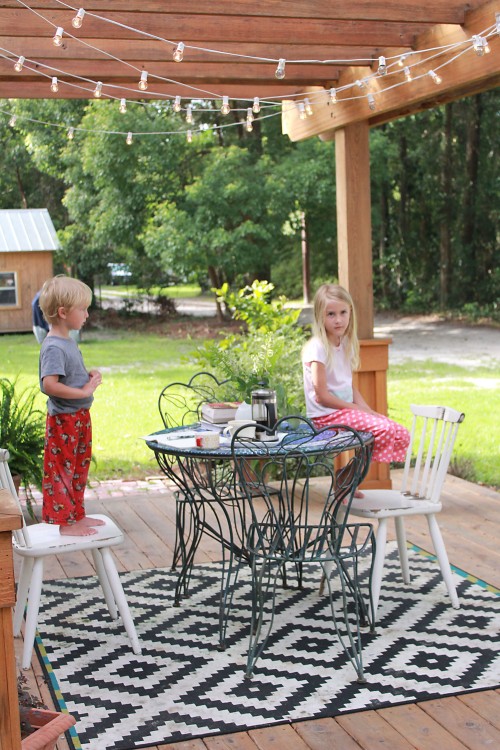
I never knew that an outdoor space could feel like another room in the house, but this area does. I think it’s the pergola that gives it a “room” feel, and even though there are no walls or privacy fences, I can still sit there and feel like I’m in my personal outdoor living room. I cannot even tell you all how much I love this space!!

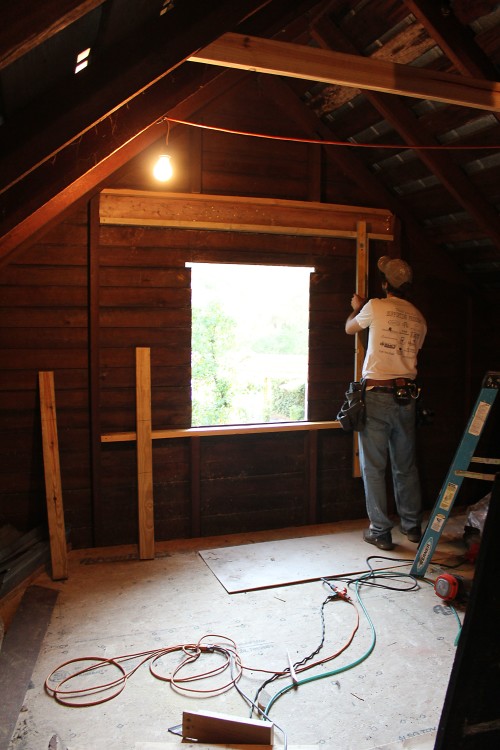
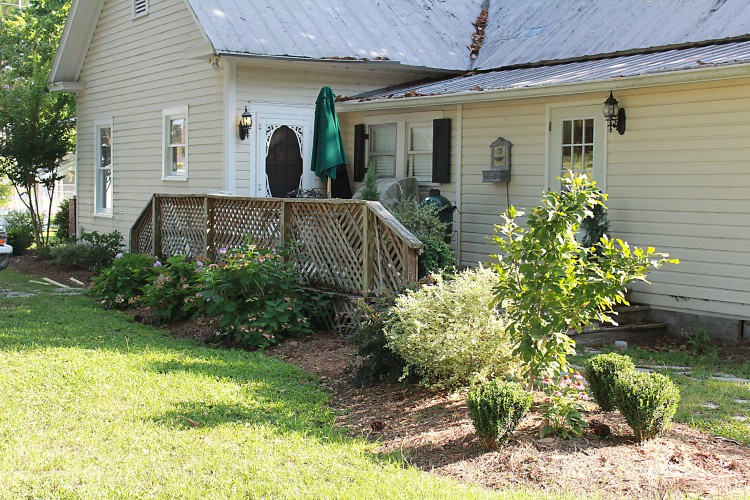
A huge part of that loving comes because of how improved it is. If you’ve been following the Cottage blog for any period of time, you know we bought this house as a foreclosure, at a time when it needed a lot of work. The inside was our focus for the first couple of years, and finally last spring we started doing more outside projects. Our front porch was first, and then, on July 4th weekend a year ago, we started the back patio.

My husband is very careful to do things debt-free, and so we have not done some of the bigger projects around here until recently, after we were able to save up for them. So that makes the finished product even more exciting. When you wait for something, it becomes even more special! :)

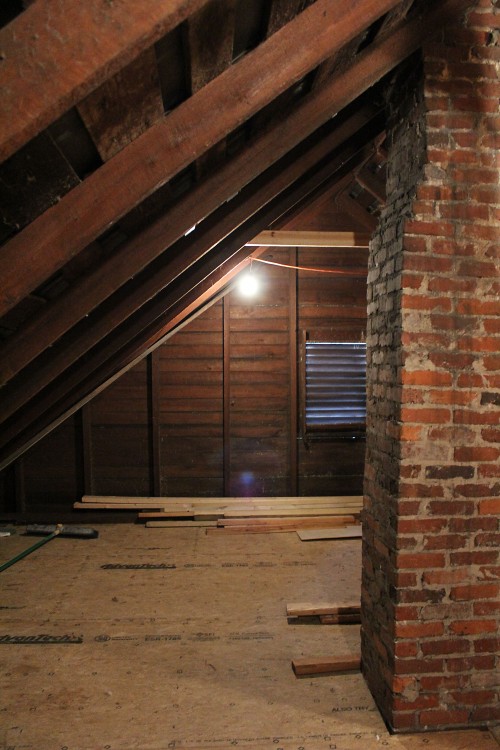
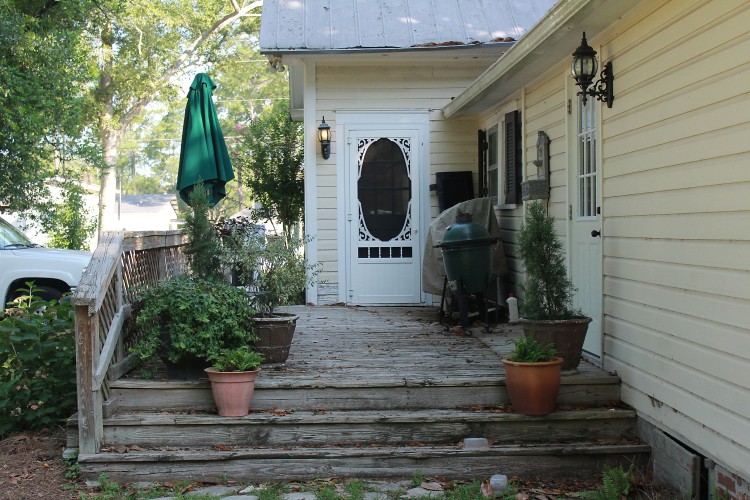
This is what it looked like for the first 4 years we were here. Lovely in its time, but with many years of wear and tear the boards were rotting and falling in, and they gave many splinters to poor bare feet!

{Before, July 2014}

back porch before

deck - before


Soooo, the perks of having a husband who can do literally ANYTHING with wood are pretty awesome. He can envision something, and make it and built it. I can decorate it when it’s finished, but he’s been the vision behind most of what we’ve done here at the Cottage. He’s really great like that.

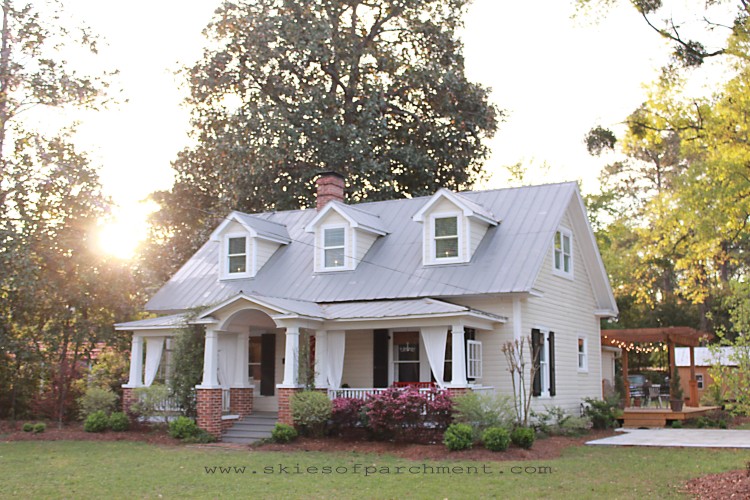
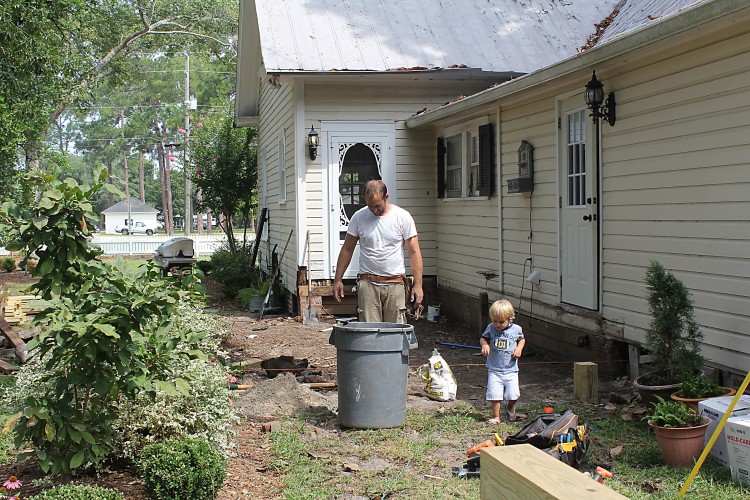
So, to give a little perspective of where this is (and there were some people who thought this is the front porch – no, it’s the back deck, off the back/side of the house :)) , this is the view from the front of the house.  The back deck is only slightly visible, so it gives a very private feel sitting back there.


cottage front view

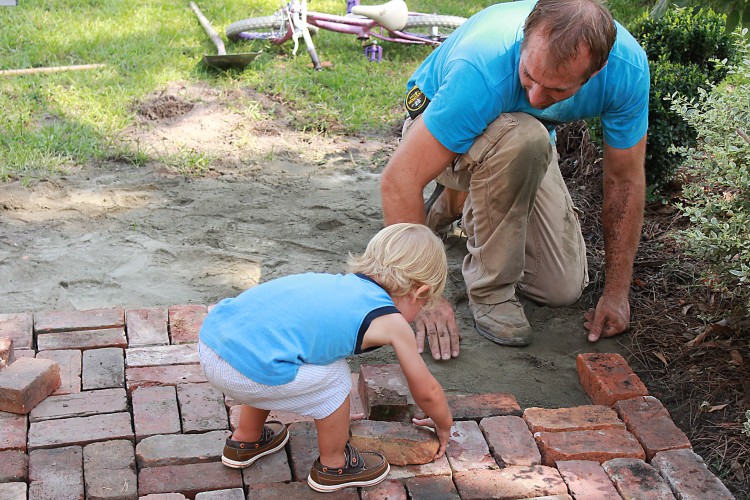
First off: tear off the old deck, beginning on July 4th, 2014

tearing it down

The process of tear-out was quick and easy, and then the building took a bit longer because of working at it evenings and weekends for several weeks a month or two. The entire process from beginning to end, including staining the wood and all of that, wasn’t finished up until November. So! We don’t do everything super fast around here. ;)

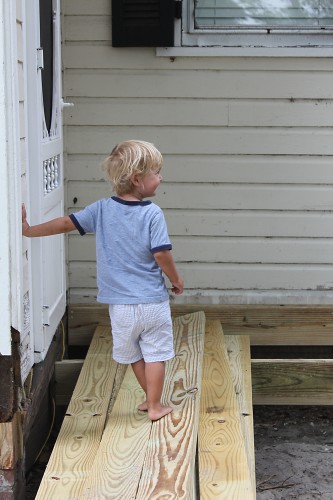
The little man was so thrilled with his apprenticeship to construction.

little mancub daddys helper

And I even got out there with a drill – because my husband taught me to love that kind of thing too. :)

IMG_1083 IMG_1246

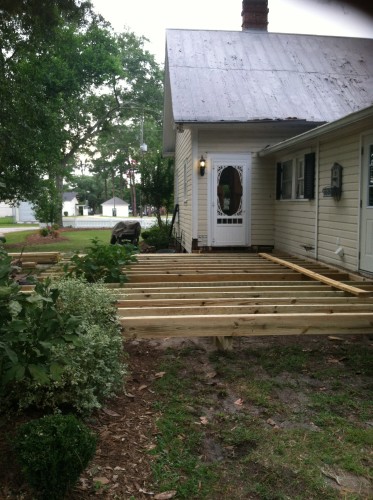
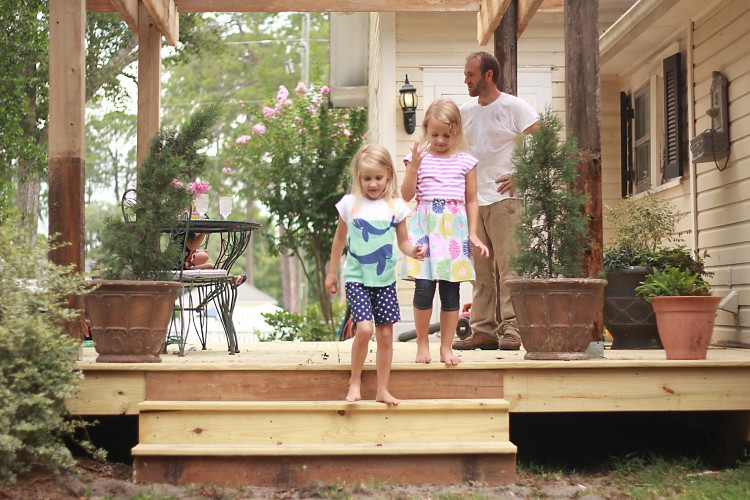
And things slowly started taking shape…

learning that work is fun

backporch living

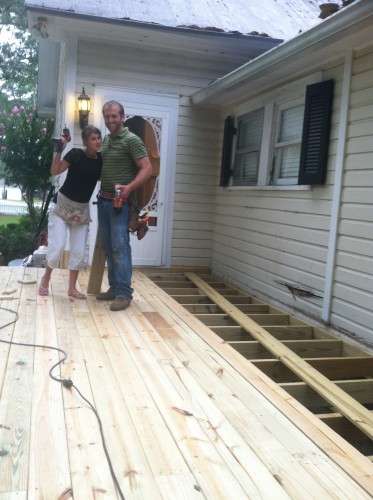
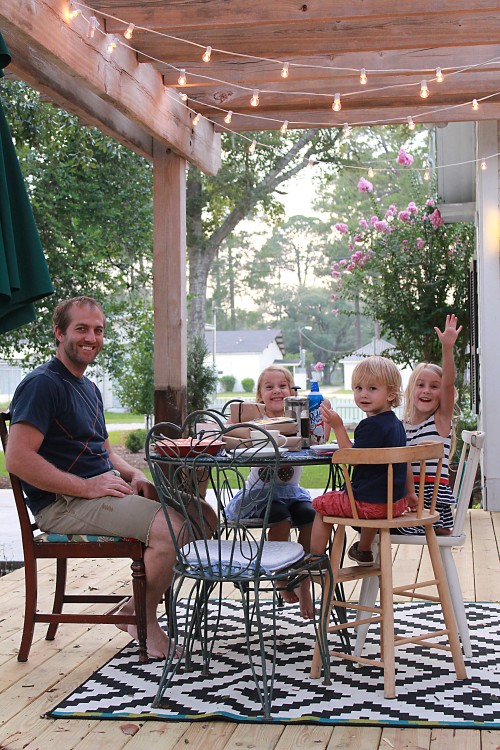
The first dinner on the patio – enjoying it even before it was completely finished because we were just THAT excited about it.

first dinner on the new deck
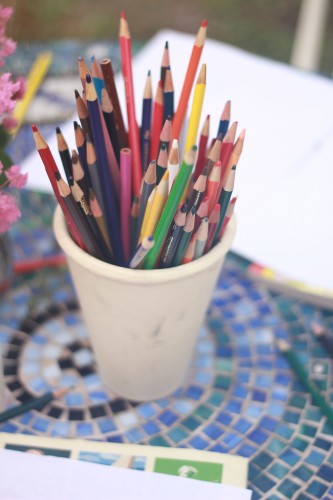
Art time – outside! When they find me outside in the mornings, sometimes they’ll bring their own things outside and we’ll all be together for a while.
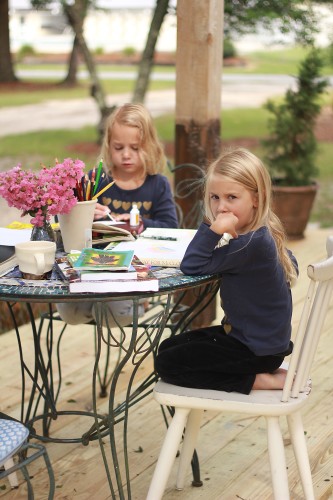
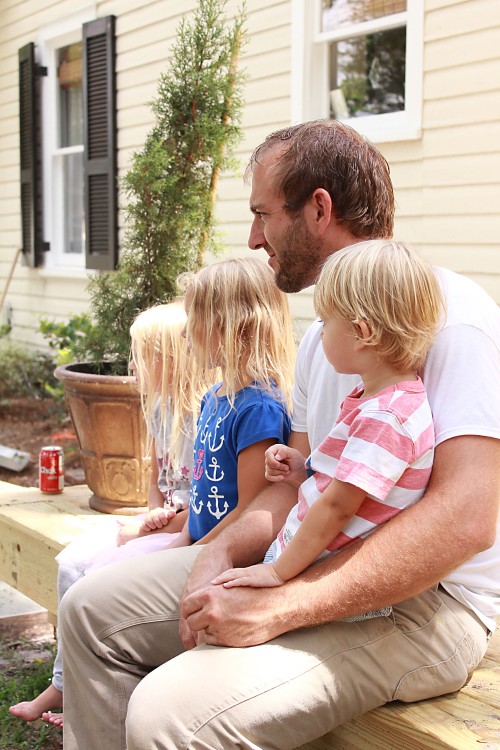
mornings on the porch art on the porch


Break time.

taking a break

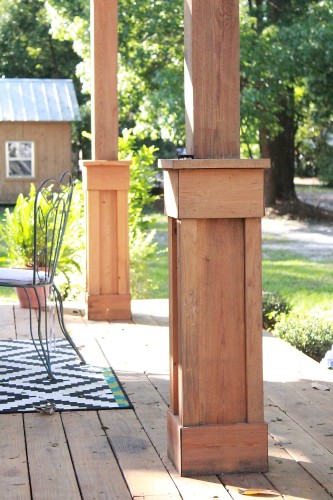
And adding the final touches  – finishing the pillars, putting lights on the pergola, staining the wood, planting ferns and shrubs in planters…

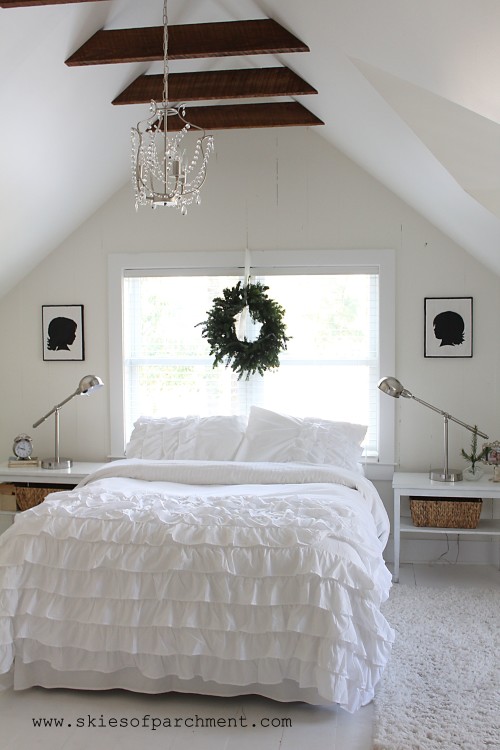
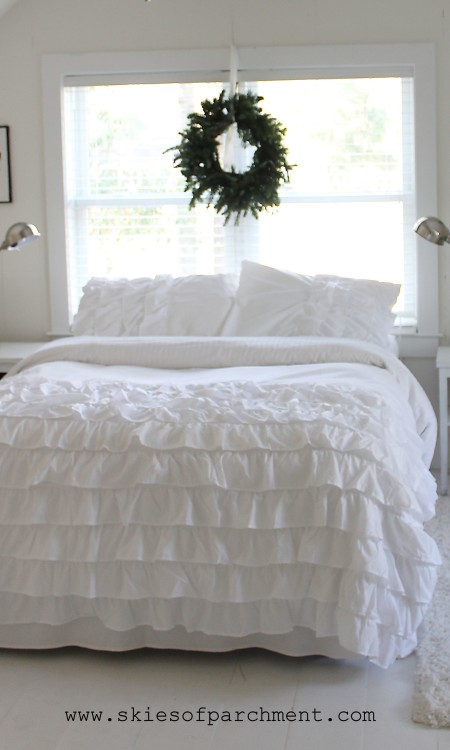
I love lots of whites indoors, but out here, I wanted lush green and full of color. It feels like my happy place.

Patio Complete 032 patio pillars


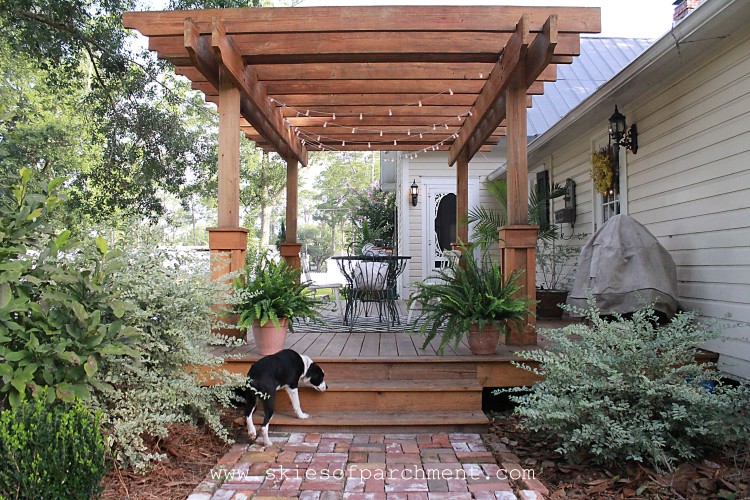
{And after, July, 2015}

Unless it’s raining, this is where you’ll find me, every morning. I’ll even wipe off the raindrops from the table and chairs if I need to, so that I can use this lovely spot. My Bible, a hot cup of coffee, and quiet time outside = the best way to begin a day!

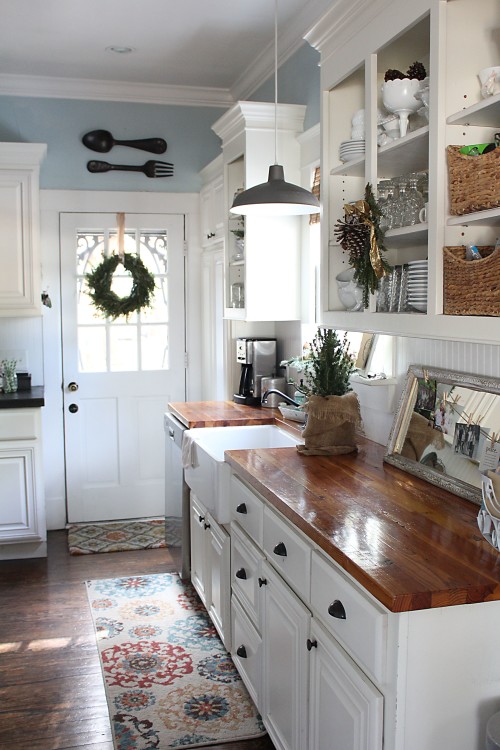
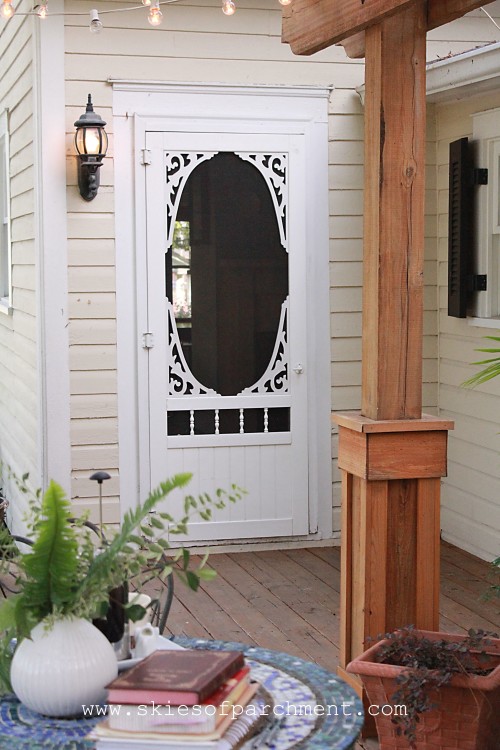
My view from the kitchen door. I mean. I cannot even resist going out there. My love of running is even being affected because I just want to BE HERE.

the patio room


morning quiet time

Patio Complete 035


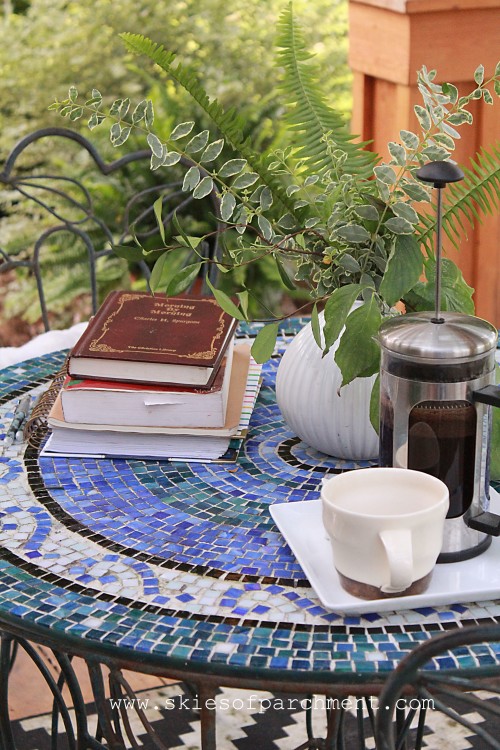
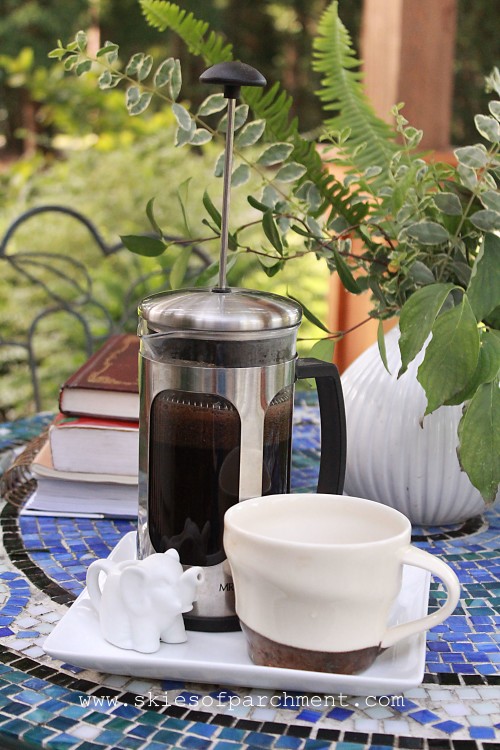
French-pressed café al fresco, anyone?


cafe al fresco

And these little cuties that sleepily join me after a while… ♥♥  Sometimes it all feels like a beautiful happy dream, these moments of my life, with my precious children.

morning risers


Sometimes I can hardly believe this is the same location; same outdoor furniture, same potted plants, but a whole new design.

Patio Complete 038


Friends and visitors are welcome! :)

signature

A Little Boy’s Bedroom

a peek in the room


So when the attic renovations were completed, and a bedroom was made upstairs for the little girls, a little boy suddenly had his own room. For the first time in his nearly-three years! We won’t really discuss whether or not he especially liked this idea, but we can mention that because of having only two bedrooms for all of his life, until now sleeping alone wasn’t an option for him. Now that it IS an option, I’ll venture to say that “fun” and “exciting” wouldn’t really be the vocabulary of choice to describe his feelings on sleeping alone, although he is so proud of his room. Perhaps he spends more time playing in this space than actually sleeping? Who knows. :)

Last fall I showed a few pictures of this room when all three kiddos were sharing. And now it’s a space just for Hudson. Yes, it is completely possible for three children to share a bedroom, AND to be organized [mostofthetime] meanwhile. However! I have been so amazed at how two extra bedrooms really do give so much breathing room, and how things can feel so much more organized!! And I’m all the more grateful now for the extra space, rather than just taking it for granted.

So this space for Hudson is simple, and I don’t have a lot of pictures.  I wanted a neutral and understated theme, with room on the floor for Legos and train tracks and those boy toys that we now have. :) I also wanted items that I could use in various ways in the future, not just “baby boy room” accessories.

Hudson’s bed was a toddler-size bed we found at an antique shop when Zoe was a baby, and it has been a treasure ever since! Why don’t they make things as awesome anymore, I have no idea.

It took a bit of effort to make it look boy-ish in that corner, but a few little touches and it came together.

  an antique toddler bed

the old bed

special friends

decor with oars

cross blanket

Opposite of the bed is a large wall map and a teepee – and yes, the kids play that they are Indians [just as I had hoped they would use their imagination]. But Hudson has been found to take naps in there as well, and it’s a fun little hide-out too.


teepees and big maps

the fireplace wall

a little teepee

teepees and big maps

teepee and map art
And a little pail of tennis rackets sits in the corner as well.

a collection of tennis rackets

And that’s our little boy’s room. Sometimes the most simple is the best of all. Or maybe it’s the more kids I have, the more I like things simple (i.e. less clutter)? Either way, there it is! :)

Happy Tuesday, friends!

signature


Sources:
Bed: antique store
Light fixture: yard sale
Swiss Cross Blanket: amazon
Black and White Aztec pillow: IKEA
Teepee: made by us
Black and White Wall Map: Urban Outfitters
Black and White Cross Rug: Urban Outfitters
Cardboard Deer Mount: Little Wanderers (out of stock) but similar found here


how to clean INSIDE your oven door

So. This is where I get all house-wifey on you. :) Because when you have your own home, it becomes actual fun to take care of things and keep it tidy!

This post was borne out of one of those moments when my oven needed to be cleaned. And so I did. Because, anyone who cooks and bakes on a daily basis knows that your oven gets so dirty. And so I cleaned it. And the inside looked great! Oven cleaner is amazing stuff, ya’ll.

But it was AFTER I cleaned it all up, closed the door, and stood back, that I realized that, “What in the world. My door looks terrible! Inside. How does stuff get INSIDE my oven door anyway? Between the glass?”

And so. I googled (Google is my best friend) and searched and figured out how to get between the glass.

And what do you know, but it’s not even rocket science. It’s super easy, and all it takes is a screwdriver. I wondered why I haven’t been doing this for years! (Those who have been doing this all your life, don’t judge. Or at least please tell me why you didn’t let the world know how to do it! We’ve been waiting! :) )

So, just in case anyone else is wanting to not only have a clean oven interior but also an oven door, here you go!

how to clean inside the oven door

Be glad you can do this in your own home without a blog watching. I am blushing beet red as I show you the interior state of my oven. Before. It wasn’t pretty, you guys.

Entitled: The Embarrassing Oven

the embarrassing oven door

A serious cleaning happened and the oven interior was shiny and lovely. Whew. At this point we will by-pass the oven-cleaning instructions, and go directly to the door.

See those big screws on the side?

where to find the screws

 Yes, those. There were three per side on my oven, so six total. Each pair was slightly different in size, so you’ll want to separate them and remember which goes where. Unscrew and remove, and it will come apart like so:

how to open it up

The door will hinge into two pieces, and the handle will probably come off (mine did). Now get busy and start cleaning both of the inside pieces of glass! This is the fun part. :) I just used Windex and a soft cleaning cloth, but you can use any cleaner of your preference. Get that baby sparkly and make sure there are no streaks or smudges!

Re-attach the door, holding the sides and pieces together, then place the screws back in place. It worked best when I held the door against my knees, and held it tightly together. This takes a bit of concentration but it’s not very difficult.

And it’s back together.

the finished product - it's like a mirror!

 It looked brand new. BRAND NEW. If I’d be emotional over household things I might have cried with happiness at this point. But instead, I stood back and just BEAMED. And felt like the Queen of Kitchen Duties.

Time frame: 1/2 hour, at the most.

I just want to sit in a chair, prop up my feet, drink a coke – er, I mean a pink drink – and gaze at my oven. I MEAN, FOR REAL.  Except I better sweep up the crumbs from the floor first. Oops.

the clean oven and door

I’ve done this twice now, because it is super easy, and because when you know it can be clean, why let it be dirty?!

Happy oven-cleaning!

(And if you’ve already doing this forever, just rejoice with those who rejoice :))

signature

An Attic Bedroom (Before & After)

We have been so enjoying the renovated attic for almost four months now, and I’m excited to share this last part of it!

textures of whites

As I’ve talked about before, all three kids shared a bedroom until this attic renovation, which worked (you do what you have to, right?), but it has been SO wonderful to have a bit more space and be more organized now! The two girls have moved upstairs to the new bedroom.

I did tell them that I would be so happy to trade with them; they can have the master suite and Ben & I will take the new attic bedroom, but they were happy to stay in their new room. :)

[Before]

A brick chimney from the kitchen and dining room came up through the middle of this room. Thankfully, the fireplaces were already not functioning, so we were able to take down the bricks to the floor level without disturbing the looks of the kitchen and dining room fireplaces.

We also put in a beautiful big window where there was only a wooden vent before.

bedroom #2 bedroom #1

[ After ]

a white attic bedroom

a cottage bedroom

This room turned out almost as I had pictured in my mind; only, better.  As with the office, I was inspired by whites, clean empty space, and Norwegian-style simplicity. I don’t know that I nailed the beauty of the Norwegian style , but I have loved this darling space!

There is something about the white that is so refreshing, and makes my whole brain feel clean. I love to come up in the office to do my emails and business. I love to snuggle with the girls in their bed at night or in the morning. I think I could live upstairs if someone would only bring me food. Personal chef, anyone?

For the bed and bedding, I chose just a bedrail underneath with no headboard or footboard. The window serves as the headboard, and the shams and bedspread are the perfect accent piece to bring a bit of elegance to the room.

  white ruffled bedspread

The end tables were found at a local antique store, and I spray-painted them white. I wanted a touch of modern in the room, and after looking everywhere online and in stores, I finally found lamps like I was wanting at Lowe’s, of all places, and they were the most reasonably priced I’d seen too. The baskets are the perfect catch-all for the dozens of papers and pens and Little Tiny Objects that little girls just seem to collect like magnets.

  a cottage christmas 128 a cottage christmas 107

Ben made this piece for me, inspired by a similar design from IKEA. IKEA sells them inexpensively but we live far from one, and shipping would have brought the price to a ridiculous amount. There are amazing perks to have a husband who can create anything with wood. :) This is one of them! It houses books in the little boxes, and toys, stuffed animals, and games in the baskets underneath.

  book shelf and baskets

[obviously these pictures were taken at Christmastime :) ]

a little girls' attic bedroom

This little corner was Ben’s idea. Rather than having a long closet with difficult access to the end of it, the closet was cut a bit shorter and this nook created. The girls love it. It’s become like a little dollhouse with beds and rooms and furniture set up.

(artwork from Aimee Weaver Designs ♥)

  happy girls are the prettiest

There is no door on the closet. This was intentional, giving more space to the actual room because of not having a swinging door. I love the touch of texture that the curtain panel gives to the room.

looking into the office

Aren’t these beams beautiful?! I swoon.
They are not original beams, although they are original wood used from the attic.

elements of wood and sparkle

doorways of the attic

Another sliding barn door is in this room, used for the bedroom door. I swoon again.

  wooden barn door

The bedroom has a cathedral dormer window as well, which was my brother-in-law Chris’ idea. I love it! The cathedral style adds such character, rather than a flat-topped dormer. We kept the knee-walls fairly low outside of the dormer for the illusion of more space. It’s just a head-banger if we’re not careful. :)

  cathedral dormers

Ben humored me again with having white floors, and white walls, and white ceiling…. white everything.  He is so kind to me, going along with my ideas so much of the time, and then coming up with so many great ones of his own. He is the brain behind the structural design of the remodeling we’ve done. This attic was just one giant room, that he created three rooms from (office, bedroom, and foyer). I can hardly believe this is the same space; it is just SO beautiful!

The room is very simple and understated, but here are a few of my favorite little touches…

cozy little spot

  bedroom vignette

a bit of whimsy
Funny story about the ‘simple and understated’: Zoe was so excited when she learned that she and Olivia would be sharing a room, and having a GIRLS’ room. She immediately began dreaming of all the COLORS (!!!) she wanted in there.

“Red on the ceiling! No, actually, red and white STRIPES! And I want aqua and lots of color!

I felt a little guilty, because well, a little girl does like color, and here I was going with not only limited color but NO color except white, so I told her that, “Sweetie, you know what? It’s actually going to be a white bedroom, because it’s in an attic, and red and white stripes just won’t really look good up there.”

“WHAT?! A white bedroom? I don’t want to be a little girl that looks back on my childhood and has a WHITE bedroom. I mean, white doesn’t even mean anything. I want something with color, and especially RED. It would be soooo boring to have a white bedroom!”

I don’t know what she was picturing, but clearly she and I were envisioning completely different things. I was beginning to feel like a terrible mother in forcing my child to have a terrible childhood and have a white bedroom, or all things!!

After the room was completed, however, she came to me with a sheepish grin and said, “Mommy, it’s okay if my room is all white. I actually REALLY like it.” :)

And a few weeks later when we bought her a red winter coat, she said that makes up for the red stripes in the bedroom. Whew. At least we got that covered.

Seriously though, I love to be a steward of that which Jesus has entrusted to me. My home is my little spot on earth’s surface, and I love how Edith Schaeffer says it:

“A Christian, who realizes he has been made in the image of the Creator God and is therefore meant to be creative on a finite level, should certainly have more understanding of his responsibility to treat God’s creation with sensitivity, and should develop his talents to do something to beautify his little spot on the earth’s surface.”
Edith Schaeffer, The Hidden Art of Homemaking    

Sometimes, in a world of ISIS terrorism and starving children and four blood moons, I stop and wonder why I even care about pretty things or home renovations, or why a beautiful new arrangement makes me so excited, or why I’m so passionate about helping people to better health. I DO care about the first mentioned things, but I also care about seemingly small things.

And then I remember… just because I love the sight of a freshly made bed, or cry happy tears at an email with good health news, or get giddy at before & afters, it doesn’t make one less spiritual. It is learning to see the beauty of God in the middle of a broken world, and taking notice of these things is actually worshipping Him and thanking Him for the ways we see Him. Edith Schaeffer says it beautifully again:

“If you have been afraid that your love of beautiful flowers and the flickering flame of the candle is somehow less spiritual than living in starkness and ugliness, remember that He who created you to be creative gave you the things with which to make beauty and the sensitivity to appreciate and respond to His creation.”  

 Responding to and appreciating His creation… with the goal of bringing Him glory: that’s what I want to do.

  a simple attic bedroom

 Happy Hump-day, Lovelies!

  signature

 Sources:
Desk Lamps: Lowe’s, Allen + Roth
White Waterfall Bedspread and shams: Ebay, similar here (they must have been running a special the day I purchased, because I paid less than half the price for the one I found)
Wall and ceiling color: Dove White, by Sherwin Williams, eggshell finish
Floor color: White Exterior-grade paint
Chandelier: IKEA, purchased from Ebay

Before & After – Attic Office Studio

So! I am over the top excited to show some pictures of our renovation process! Last fall felt like a whirlwind of action and work as we began the attic renovation and completed it in 10 weeks, just in time for the Christmas Tour of Homes we were scheduled for.

We thought our following two months would be slow(er), but they’ve also been filled up with some unexpected events, bringing us almost to March and I still haven’t shown the attic reveal!

There are several rooms that have been changed around here at the Cottage as a result of two additional rooms upstairs, but today we’ll begin with the attic, and the Office Studio on one side.

attic office


I have told people that if someone would bring me food and water, I could literally live in these two rooms upstairs. I absolutely love it!

I (I saw “I” because my husband very kindly let me choose the colors and style up here, but he did 99% of the work) went with whites – white on the walls, white on the floor, painted white wood on the end wall… A lot of white.

I was inspired by Swedish and Norwegian homes of much white space, and therefore minimalistic décor. I wanted a very simple look with clean lines. I couldn’t be happier with how this space turned out!

But first! A before shot. No windows, no insulation, not even a floor. Just dark.

We were working with a small-ish space, with very steep roof lines, and so wanted to use the fullest potential of this area.

bedroom #1 before
And the same space, after:

a white attic office


I know!!!!! Can you even believe it’s the same space?! I feel like I’m walking into a dream every time I come up here.

Our basic game plan for this room was to add a dormer window toward the front of the house, a big double window out the side, add electric and A/C, add knee-walls and then dry wall on the walls and ceiling, add flooring, add wood to the end wall. It was a LOT OF WORK. My husband did most of the work himself, along with working a full-time job. He put in so much time and hard work! And the way he transforms a place is simply amazing. His German work-horse roots come out in full force during something like this. :) I am simply in amazement of his vision and then the way he reaches his goal. There’s a reason he is wanted in the construction business!

The ceiling is high, about 13 feet at the peak. And this room is sized about 10 X 12, so we weren’t looking at a huge area, but because we only have two bedrooms on the lower level of the house, having this additional space was going to be wonderful! This room could be a bedroom, but we are using it as an office studio for now.

Ben and I share this office space. It’s simple, it’s white, it’s clean. I LOVE IT! Long-term our set-up probably wouldn’t be ideal, but for now we have a table for a desk, some filing cabinets hidden to the side, and a closet which holds any extras for us.

There were two brick fireplaces going up through the attic, due to two double fireplaces (that equals four) in the four front rooms of the house. I was so thankful we were able to place the rooms so we could save one of the chimneys going through the roof. I love the warmth it brings to this attic space, and gives it such a studio feel.

He also MADE (insert a million heart eyes) this sliding barn door, or actually three of them, for the upstairs. The closet uses one of them.

sliding door in the office


This table I found for super cheap at a thrift store, and my husband thought it was so ugly and couldn’t believe I would pay money for it. So he added the reclaimed lumber to the top and it turned into a gorgeous piece!

farmhouse style desk for the office


The sofa (which I found for $35 dollars on craigslist (and now I a.d.o.r.e. craigslist all the more) adds the perfect touch of warmth and texture to the room.

tufted sofa for the office

vintage sofa with modern pillows


The décor is minimal, but this little area is a favorite of mine:

floating shelves

floating shelves with simple decor


I’m learning, when having a palate of white, that texture is essential. So while most of the décor is white, here are a few ways I’ve added texture:

– the Eiffel chairs add a modern element [wooden legs, smooth chair]
-the table [white painted legs, top made of reclaimed lumber – thank you, dear Husband!]
– the shelves [floating style, shiny finish]
– wood boards on the end wall, and painted
– wooden floor, also painted but slightly different color than the walls
– metal pendant lights, painted black for contrast
-metal distressed ampersand

Each thing is a slightly different material, or color, or texture. And putting it all together with the slight differences but similarities are what give it a clean but warm feel.

an attic office


I think the work of restoration is so amazing. And such a picture of the redemption of Christ in the life of a person! He takes what we think is ugly, useless, beyond hope, and turns it into a masterpiece. If we as humans can do physical repair, how much more can the Great Restorer work on a deep soul level! I love that picture.

Be blessed because of the work of the Restorer in your life today!

signature

Sources:
Wall and Ceiling Color: Dove White, Sherwin Williams, eggshell finish
Floor: White Exterior Grade Paint
Eiffel Chairs: Amazon, similar here
Floor Lamp: Target, found here (and they are 10% off now!)
Floating Shelves: Lowe’s, found here
Metal Pendant Lights: we found them free!
Swiss Cross/Plus Sign Rug: Urban Outfitters, here
Table: thrifted, and Ben added the reclaimed lumber to the top


The Cottage at Christmastime.

Merry Christmas, everyone!

We are so enjoying being finished with the attic remodel and actually being able to enjoy the finished product now! It’s been a very busy autumn, and the feeling of having it completed is wonderful. I’m looking forward to showing some more pictures of the finished attic, but for now, here are a few pictures of the Cottage at Christmastime.

The Christmas Tour of Homes was a little over a week ago, and so I snapped some pictures on Monday when it was all over – not having time before (we were crunching until THE very last minute to finish everything up).

It was interesting, because earlier this fall I wrote an article for this magazine about Christmas décor and about wanting to keep Christ in the center. The very same autumn we were asked to be part of a tour of homes in our community. And the words that I wrote were being tested, because I heard that sometimes interior designers are hired for the homes on the tour and that it can be a rather big deal.

My décor is very simple, and I only pull out a box or two of Christmas décor from the attic while the rest of it is natural live greenery. My first thought was to be intimidated, and scared! My house isn’t interior designer style – it’s full of second-hand treasures, and thrift-store finds, and handmade. It’s what we done because of the budget we live with, but truly, it’s what I LIKE. I like the eclectic mix, the treasure troves from different places, the uniqueness of the things coming from many different places.

And so we made the choice to just offer the simplicity that we have. Not to make it something we are not, not to try to impress a certain group of people, but just to do what we normally do and not to apologize for it.

Like I wrote in the article, people are so different and God made us all like that out of the beauty of creativity. And as people are different, so styles will be different, and there is not a right or a wrong style of décor. Each person will have something that they like, and it expresses who God made them to be, and brings glory to the Creator because of that. The hard thing to remember sometimes is that it’s okay to be different, to like different things, to have a different style, as long as it’s not a try-to-keep-up thing, or a comparison thing that makes us feel better or worse about ourselves. The style doesn’t matter nearly so much as the heart behind it; what is my motive,  the reason behind why I do I do?

All that to say, I had to check my motives during the house tour preparations. Different parts of our homes have been featured various places, but not a house tour before, so this was a new experience for us.

So, let’s just pretend you came for the tour, and are walking through the house.
Welcome, and please feel free to look around!

Please come in at the

front door…


front cottage entrance

plaid blanket for a cozy porch the front porch

  welcome to the cottage

hanging baskets with fresh pine

Step inside to the

Living Room…


quiet aftermath living room

living room

living room   Christmas Cottage l mantel with antlers and garland Christmas Cottage l JOY marquee mantel Christmas at the Cottage l JOY marquee DIY merry and bright living room bookshelf

The Dining Room


dining room centerpieces tiny trees for a centerpiece living room

dining room mantel

The Kitchen


a christmas cottage kitchen

  kitchen vignette

oversized fork and spoon little fir tree in the kitchen kitchen shelves greenery a tiny tree in the kitchen

The Hallway

the nativity

Hudson’s Bedroom


little boy

  little boy room

The Music Room/School Room


music room cozy corner music room desk corner
The Master Bedroom

master bedroom with wreath

master bedrorom vignette master bedroom master bed room vignette master bedroom decor

gold and polka dots

And then let’s go up into

the new attic!


the new stairway   christmas sled christmas sled and gifts

The Attic Bedroom


a white attic bedroom   attic bedroom greenery

silver and white attic bedroom bedside

The Office

  a peek into the attic office office christmas shelves office vignette   wood and brick

And that concludes the little Christmas tour at the Cottage!

I hope you all enjoy your Christmas Day, but even more than that, that you can truly worship and rejoice in the salvation that Christmas signifies. What an incredible gift! May the wonder of it never cease to amaze us!

This read by the Gospel Centered Mom is beautiful and inspiring in teaching our children the true meaning of Christmas.

Thank you for visiting this little corner of blogland and the encouragement you’ve been to me throughout this year!

A very happy Christmas to each and everyone!

signature

DIY Marquee Sign


  Christmas at the Cottage l JOY marquee DIY

It’s the 2nd of December!
Is anyone else in disbelief that this is the last month of the year?! I still feel stuck back in October, and it seems impossible that it’s nearly Christmas!

However, next week is the Christmas Tour of Homes that we were asked to be part of, and the fluffy of activity around here shows the reality that this is actually NOT September at all. Things are moving right along with the attic remodel, but we are still finishing up the painting and needing to install floors. Don’t make me panic by being shocked, it’s just a little nuts. But there are some amazing things happening upstairs, and I can’t wait to show you! My husband is just a master at his trade, that’s all I’ll say. Oh, except I’ll add that he made sliding wooden barn doors out of reclaimed lumber for the closets and bedroom doors, and they are unreal awesome. UNREAL.

But, back to the marquee sign! As I pulled out the little bit of Christmas décor that I store, and brought in huge armloads of fresh greens, this JOY marquee sign came out again. And I fell in love all over!

I made this as a reminder to me that joy is not a feeling, or a circumstance. Joy is a deep reality that is true, even in the middle of sorrow and pain. I was mourning the loss of my friend Ruth, and Christmas just didn’t have the same happy, warm-fuzzy feeling. I made this to remind me that JOY is because of Jesus, and the deep reality of Heaven and eternity. And that this life is not the end of the story. Joy means more to me now than it ever has!

So last year when I showed the cottage at Christmas time, quite a few people asked how my husband and I made this marquee sign that we hung in our living room. So, a whole year later, here’s a little tutorial for those of you who would like to know how!

There are probably as many different ways to make a marquee as there are different DIY marquees. This is only one, and we went this route because it was the least expensive. Ha! And you could use the little Christmas tree lights, or different words, or anything you like! I combined several ideas I found online for this specific marquee.

SUPPLIES NEEDED:

– plywood cut to 2 X 3 feet size, plus extra to make 2-inch sides
– white paint
– Mod Podge Glue
– Gold Glitter
– Paint brush
– Stencil and pencil
– Patio lights (1 set of 24)

supplies needed

Okay, so I will say that I needed my husband for the beginning of this project. Because of how the lights and cords are in the back of this marquee, you need sides on the board or you will see all the hardware and jungle of cords from the side. You don’t want to see that, trust me! So he added the sides for me to form a small box-type of board, to hide all the things behind it.

So, here are the steps:

1. Cut board to size (we made it 2 X 3) and add sides.

2. Prime and paint white.

3. Sketch or stencil ‘JOY’ with light pencil marks, centering in the space. I made them very large, filling most of the board.

sketching the outline

4. Drill holes.
This is just a small hole (we made ours far too big; we learned as we went and didn’t make a perfect second marquee! :), enough to allow the base of the light bulb to go through. You want it to fit tightly so it holds the bulb snug. We bought a package of 25 patio lights, and marked 8 holes per letter. There was one bulb and socket left over that we didn’t use, and then had an extra light bulb if we needed it.

(We actually did step #5 before #4 and that was a bad idea. We had to touch-up paint, and it would have saved time and been better to do #4 first.)


holes for the bulbs

#5. Paint with gold paint, let dry, then paint with clear Mod Podge and sprinkle with gold glitter. Heavily sprinkle. And then behold the glitter bomb that goes off in your house! Be sure to shake off the excess OUTSIDE the house.

 Zoe LOVED being part of this process.

adding the glitter

JOY prep glitter!

  holes are drilled

#6. After the paint is dry, insert the patio lights! Take them apart first, then screw them together with the bulbs on the outside of the marquee, the sockets on the backside.

patio lights separate the bulbs

  bulbs in

The backside will look like this when you’re finished. Be sure to have the cord on the side closest to your receptacle. I still needed to use an extension cord because my outlet isn’t very close.

backside of the marquee

#7. Hang your beautiful masterpiece and enJOY!

Christmas Cottage l JOY marquee mantel

  Christmas Cottage l mantel with antlers and garland

  Christmas at the Cottage l JOY marquee DIY

 Have a wonderful first week of December

signature